Crafts & DIY · Sewing

Disney Lanyards: Pin Swapping Fun

This is a NEW TO US Disney Activity!

The last time we went to Disney was December of 2013, so were were a family of 5. Our kiddos were ages 6, 3, 1.5, and I was 5 months pregnant.

I never said we weren’t crazy.

At any rate, collecting/swapping pins was NOT on my radar. The kiddos LOVE meeting the characters and collecting autographs though….and since that isn’t currently possible with the COVID protocols, they do still have a system in place to keep pin trading alive. I found this explanation of how pin trading works SUPER helpful.

Of course, due to the pandemic, things work a little differently, so THIS breakdown is how we will have to go about our trading. If you don’t want to click it….it basically says there are trading “posts” set up at the different parks and you can look through the boards, choose which pin you’d like to trade for, and a cast member will get it for you.

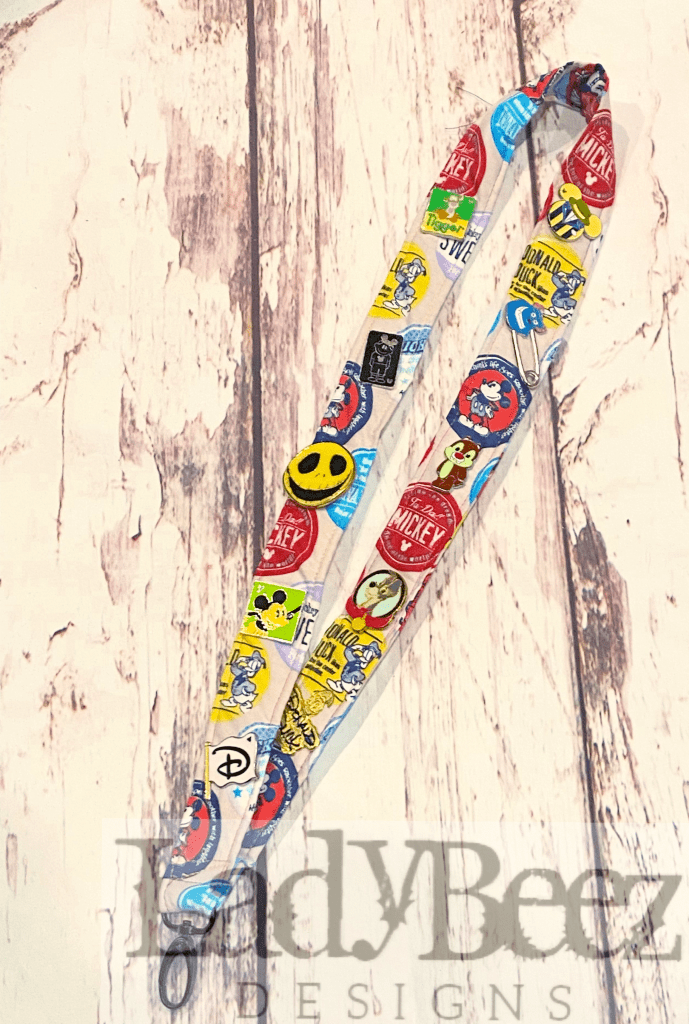
In order to save time/money…..I made us our own lanyards to carry/display/keep our pins!

Here is a quick measurement guide:

Cotton fabric: 4” x 37”

Fleece for batting: 1” x 34”

Then it’s just ironing the strips of fabric around the fleece and sewing them up….attach clip on the end and Viola!

Is this free? Maybe not for the average Disney goer….but I have all these supplies already, so for us IT IS!

I also wanted to have the kiddos start off with some pins, of course……so I looked and looked and looked….after reading lot sof great reviews, I decided this was the company I wanted to go with to not be scammed. 🙂 I bought a lot of 50 pins. We divided them up: 10 for each kiddo and 10 for Mom & Dad.

SUPER EXICTED to surprise them with these! I wonder which ones they’ll want to keep….and which ones they feel like trading 🙂

Crafts & DIY · Sewing

Semi-Handmade Disney is Coming!

Once again, summer is whizzing by.

Now, it had become a regular occurrence that I take a couple months off of sewing, blogging, and just social media in general because there just aren’t enough hours in the day, ya know?

And, to be honest, I’m happy to do it too.

Many reasons include:

  • 1.Our kids are growing fast, and I know they would much rather be spending time with us then be dressed to the nines…..
  • 2. My customers are also not in the spending mood during summer months, as they are doing the same with their own families…..
  • 3. This break allows me to relax and renew my zeal for my craft.
  • 4. This year….my sewing studio got ripped apart due to a flood….so the break extends!
  • 5. and the MOST exciting. We’ve been prepping/planning TO GO TO DISNEY WORLD!!!!!!

To say we are excited would be a MASSIVE understatement.

The KIDS HAVE NO IDEA.

(so if you know us and see us IN REAL LIFE…..please don’t mention ANYTHING)

We actually had this trip planned for October of 2020, but for reasons related to the pandemic, we decided to postpone…and although it was a hard decision, I truly believe it was for the best. (Kids didn’t know about it then either 😉 )

Obviously, I love to craft and sew, but Disney can be OVERWHELMING with ALL OF THE THINGS….so I’m trying to make it less stressful and still feel as though I’m using my talents to a degree that will appease, well….me. LOL! Plus….everything can get VERY expensive, so what I will say is …… I’m trying to be OVER.THE.TOP. Magical on a not-so-Magical-Budget.

I know, I know…..I’ve been told by many….the kiddos won’t remember all the “Things”…..they’ll remember the experience…so, I keep trying to remind myself to: Reign it in. Ask for help. and LET (SOME OF) IT GO!

Over the next couple weeks, I am planning on sharing some more of things I’ve made to make our visit even MORE MAGICAL….so hold on to your EARS!

My Hallmark Obsession

Christmas in July: Hallmark Christmas Movie Showdown Recap 2020

You would think that with my love for Hallmark Movies….and ESPECIALLY Hallmark CHRISTMAS movies, I would be all over the “Christmas in July” craze.

I’m not.

I’ve had the pleasure of living in Wisconsin my entire life. I love my seasons. I NEED my seasons to match my Hallmark.

My Christmas/Winterfest needs to have SNOW….my Spring Fever must BLOOM…..my Summer Loving must be HOT and SUNNY …… and my Harvest Fest must have gorgeous Orange/Red leaves. It’s how I was raised. I mean, I will not even plan warm vacations if they fall over the Holiday Season.

So, I will not be watching Christmas Movies in July….but that doesn’t mean I am not HERE FOR YOU to help you make the hard decisions in your life.

Like……. Which of the 100s of Hallmark Christmas Movies are worthy of your sweet time?

This past Holiday Season marked my 2nd Annual Hallmark Christmas Movie Showdown Bracket.

Yes, I turned my Hallmark Movie Obsession into an interactive game/competition. Yes, other people participated in this with me….and YES, YEAR 2 was an OVER THE TOP SUCCESS in more ways than one.

We watched MORE MOVIES. We had MORE PARTICIPANTS. We gave away MORE PRIZES!!! I even reviewed almost all of our bracket movies on this blog.

It was AMAZING….and exhausting. I may have even had a little Hallmark burnout towards the end. (Hence why not all movies got reviewed)

However, with the help of my fellow Bracketeers, we crowned a 2020 Hallmark Christmas Movie Showdown Champion.

We also answered the ultimate question: Would you watch this movie again?

So, without further ado. Here are our 2020 Stats.

Hallmark Christmas Movie Showdown 2020

Bracketeers: 54 brackets were filled out

Movies Watched: 32 movies in the bracket (yes, this means some 2020 premieres were left out)

Overall Bracket Winner: Good Morning Christmas

List of Movies in Bracket that we’d watch again. This is polling from 52 of our 54 bracketeers…not all voted, so percentage is skewed a bit. However, it’s a good idea of which flicks were the most well loved. The following percentages are the percent of our viewers that would REWATCH each of the bracket movies:

Now, there are some very important things to note:

8 of the 2020 premieres did not even get placed in the bracket to begin with….and of those, in my humble opinion, 3 of them were some of THE BEST MOVIES of the season: The Christmas Bow, Deliver by Christmas, & Project Christmas Wish. All three of these mentioned could have competed with the Elite Eight hands down.

Want even MORE info??? If you click on the Movie Title in the Above List….you’ll find my blog review. Looking for a second opinion? One of our bracketeers, Jamie, gives her Two Cents HERE.

Also, I know Hallmark is showing many more Christmas movies from their stash. HERE are our 2019 rankings!

and if THAT is enough…..feel free to ask me anything! I love chatting Hallmark movies! Man, this recap has really got me jacked for Christmas 2021!!!!

I can’t wait!

Crafts & DIY · Tutorial

No Sew Fabric Flowers, two ways: A Tutorial

Hiya Folks!

I’m back with part two of the Handmade flower tutorial that I talked about on Local 5 Live yesterday morning… Seriously, did that really happen? I’m so glad to have video proof!

I’m still getting over the craziness of it all! Pic above….but here’s the video if you missed it.

So let’s Talk fabric flowers! Both types of these flowers are made the same way… But I will walk you through them step-by-step! I promise anyone can do this!

Let’s start with the One Colored Rose Type, shall we?

Supplies Needed:

Duct Tape

Wooden Dowels

Fabric strips

I spray painted my dowels ahead of time… This is a quick and easy way to do it. However, you are more than welcome to leave them plain… Paint them by hand… Or even cover them with other colorful tapes

Next we are going to start creating the rose.

For your fabric strip you can experiment with different lengths and widths… The width I would say use between 3-5” ….for length, the longer the strip is, the FULLER your rose will be. I like about 25-30”.

Below I am showing how to fold the fabric: fold over the end about 1/2 inch and then hot dog fold it in half.

Before you go any Further you want your tape ready. Now, you can buy smaller duct tape… But the large duct tape will work just as easily if you cut it in half. Make pieces about 1 1/2”-2” long and your last piece should be about 3”.

Insert the dowel and tape to secure.

To create the flower, you’ll pleat the Fabric three times, and then secure with tape. Rotate the dowel, and repeat this process until you reach one inch away from the end of your strip of fabric.

Here you’ll want to fold the end in so it looks clean, and the end won’t fray.

Almost there!!!! Now take your last longer piece of tape and finish it off by wrapping it tightly around the dowel.

YOU DID IT!

If you’re more of a “moving picture” kind of crafter….I attempted a video of this process below 🌸 🎥

Practice! practice! PRACTICE! Soon you’ll have a vase full!

Now, once you’ve mastered that idea….you can make this second daisy-like flower in the same manner…..the only difference is you’ll have two colored fabrics, and wrap them either tighter or looser.

The center will look best cut about 2- 2 1/2” wide and 10”-12” long. You’ll do exactly as above for the first 3 pleats, but then you’ll just wrap the remainder tight in the circle and secure with tape. It will look like a BUD.

The second fabric should be 3- 3 1/2” in width and 15”-18” in length….and you’ll perform the same pleating/taping as above with the rose…..juuusst a little looser.

And there you HAVE IT!

TWO FLOWERS, one method!

Please share pics of you make some of your own!

AND HAPPY MOTHER’S DAY!!!

Crafts & DIY · Tutorial

Button Flowers Tutorial

Aren’t these flowers just as cute as a button?

OK, I know that was horrible… But I couldn’t resist.

Hello! and welcome to all of my new friends that might have stumbled upon this little blog after seeing me this morning on Local 5 Live! I’m so grateful to have had the opportunity to return and show you a couple easy crafts that are so easy you could even make them with your kids…

You did remember that Mother’s Day is Sunday, right?

Supplies needed:

BUTTONS of all shapes and sizes

WIRE: prefer 22 gauge as it’s easy to work with, yet still has a little strength

To assemble the flower simply weave your wire up through one hole of the button and down through the opposite hole. You will do this with all of your buttons at the same time so stacked two or three together.

Next twist your wire… The trick I told my kiddos is to hold the wires while twisting the button… It makes it’s a lot easier.

Now if you want to stop here and just stick these in a potted plant… It adds a fun pop of color.

However you can continue and add some leaves to your button flower by attaching two buttons to the end of a piece of wire and wrapping it around the center stem.

Then your button flowers can be the star of its own show!

Since I come from a long line of women that had button collections… An added super special piece to our button flowers is that they contain buttons from my grandmas and my mom who are celebrating their Mother’s Day together in Heaven. It’s so nice to be able to look at these button flowers and remember them ❤️

I’d love to see the Button Flowers you make! Feel free to comment with pictures!

And I’d love to have you come back and visit tomorrow when I post the No Sew Fabric Flower Tutorial!