Crafts & DIY

No Sew Fabric Christmas Trees

Happy December!!!!

I know I’ve just been all things Hallmark movies here on the blog lately….but I have been busy doing other more creative activities too.

I really needed to up my Christmas home decor game after watching all those beautiful Hallmark scenes for the last month and a half!

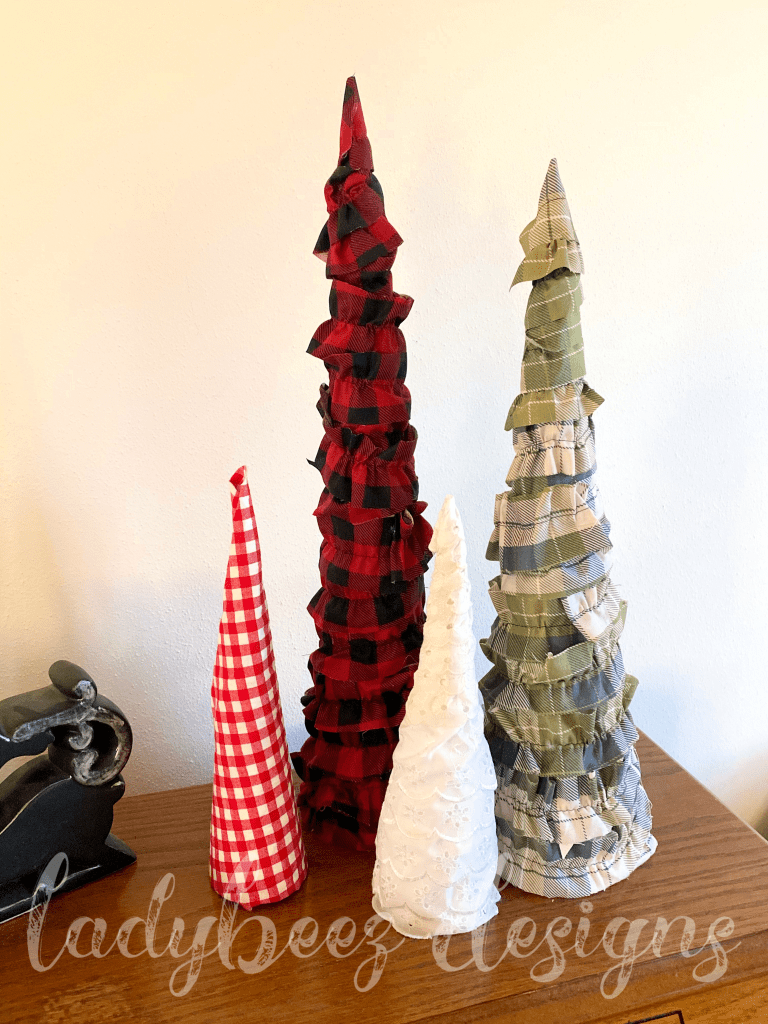
Enter these fabric/trim trees.

Now I’m sure you could find cones in the craft stores…..but I am nothing if not cheap…..so when I saw you could make them from poster board for some pocket change…..I began my forest!

I didn’t use a template at all…..just started rolling poster board into a cone…..taped it all up with good, quality packaging tape….and got to decorating. I got 2 large cones, 2 medium cones, and 2 small cones of varying sizes from one standard poster board.

With only my trusty glue gun as my weapon, I dug through my lace, trim ,and fabric and started construction from the bottom up.

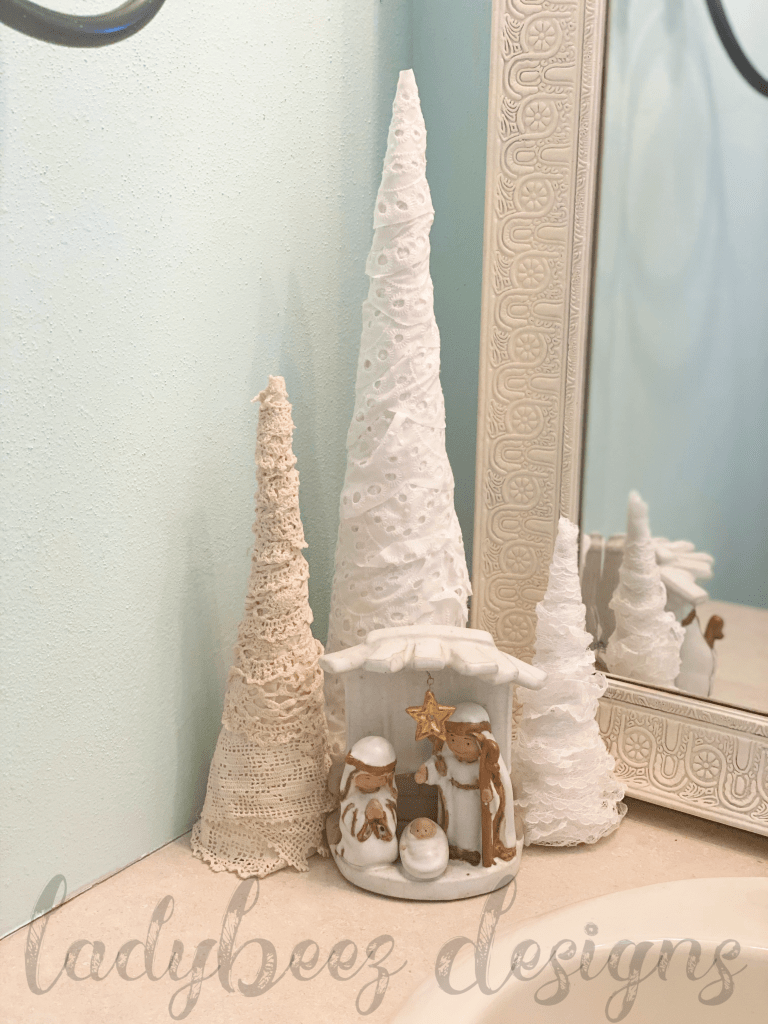
The Lace versions are prefect for a softer look:

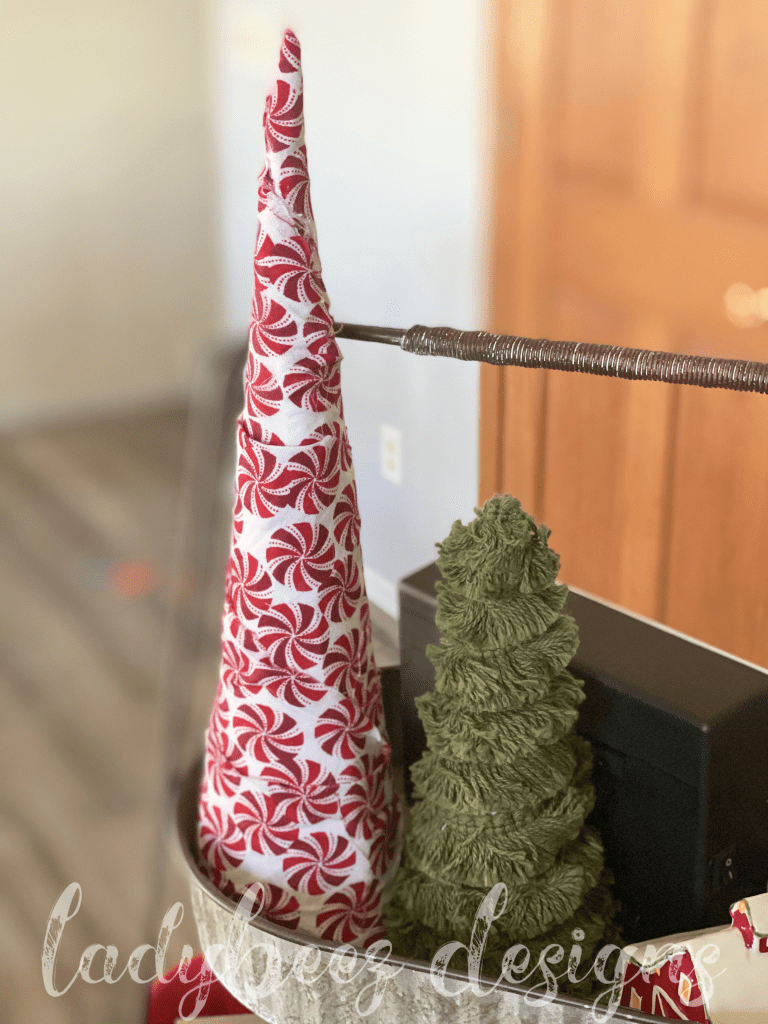
These are my kids’ favorites! The green was what I had left of this trim…..but I also love it so much, I might have to buy some more like that. And a straight-up peppermint candy quilting cotton is just glued down in strips.

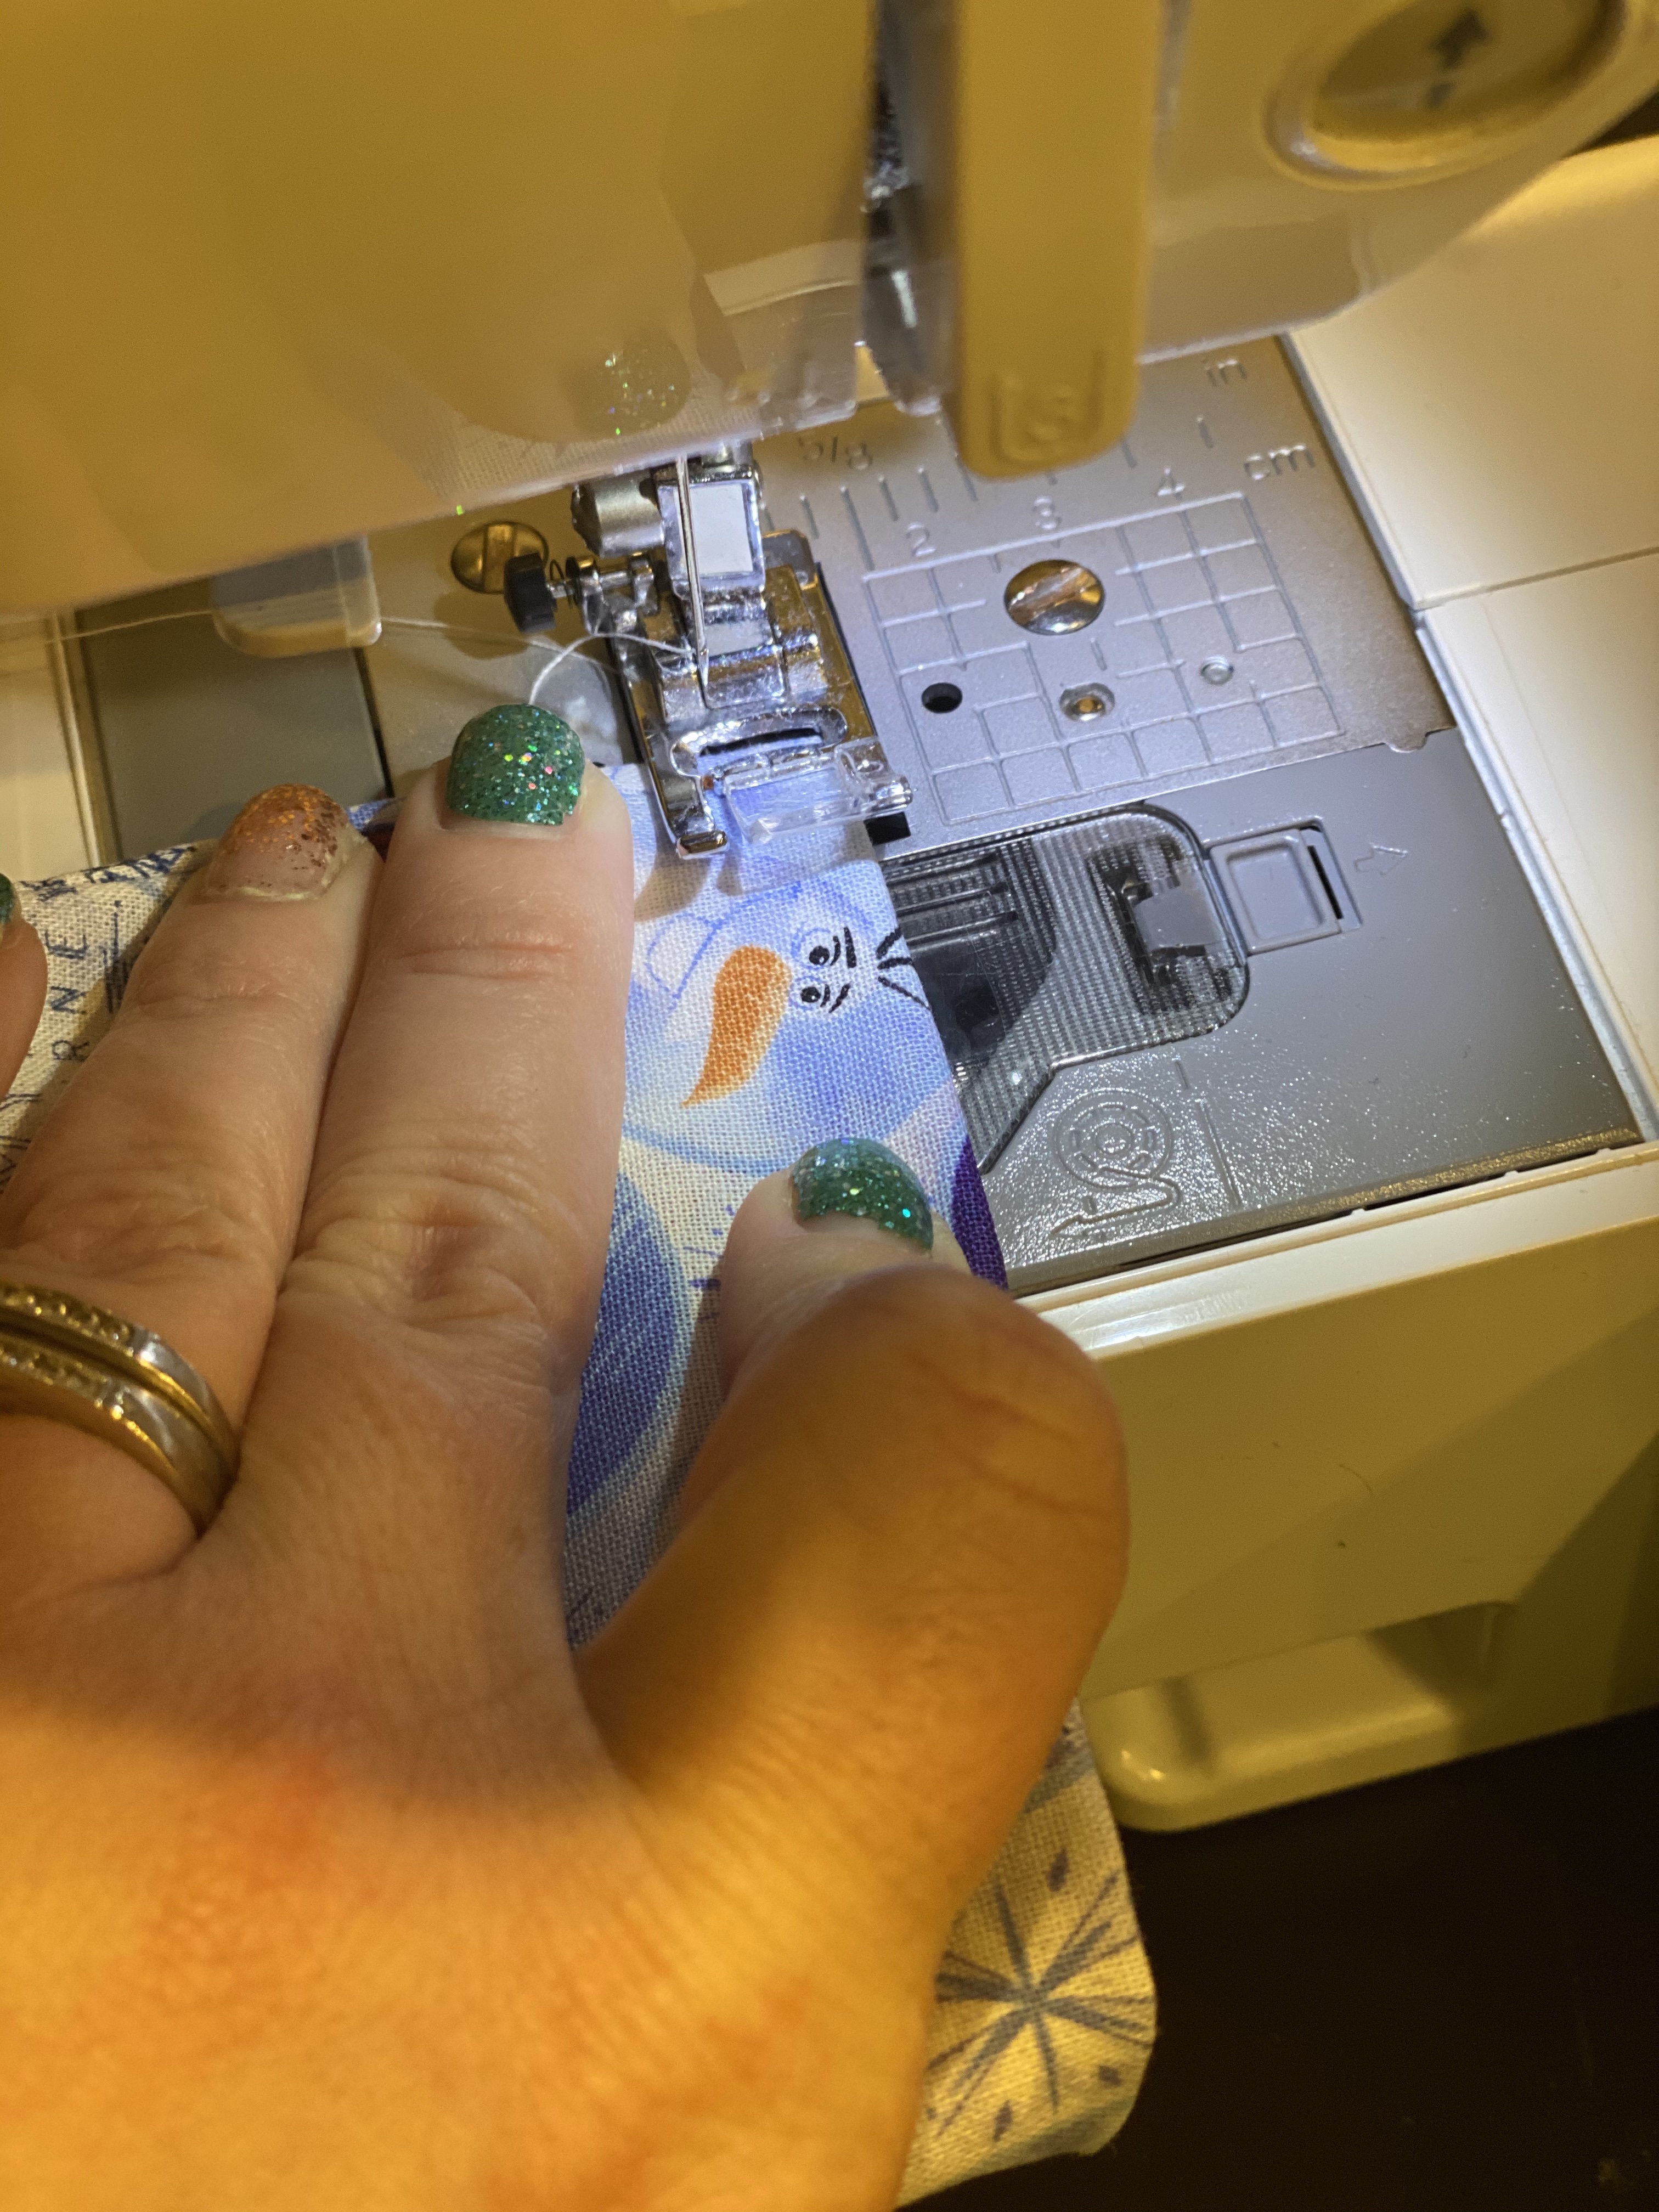
I then proceeded to fancy it up a bit with the plaid. For this look, I cut 2 inch strips of fabric and ran a long stitch down the center and gathered for a ruffle. (I Know, I said no-sew….you could still totally hand gather the fabric as you glue….but I am all for quick and easy)

Those ones are my favorite!

I’d love to see what you come up with if you make some of your own!

Sewing

Temperature Quilt: October 2020

Here we are.

I actually had this ready to post for a couple days now, but I thought I would use this beautiful array of color to brighten your internet eyes today. If you haven’t been off the grid for the past…well, 4 years, you know that here in the United States of America we had a Presidential Election yesterday.

I don’t speak about politics on social media.

There is a reason for that.

It’s not because I don’t care. It’s not because I don’t have an opinion.

It’s because what matters the most to me in this life is not the RED or the BLUE. Politics somehow makes so many people see only those 2 colors around election season.

Those people that don’t vote the same way you do….guess what?

They are your friends.

They are your family.

They are the moms and dads that commiserate over the day-to-day hardships of parenting with you….and also love your children as their own.

They are the healthcare workers caring for you and for your loved ones.

They are the teachers you so desperately respect for their patience and effort to educate your children.

They are the people that you sit next to in church.

They are the kind strangers you pass everyday.

They are the ones that surrounded you when your loved ones died with cards…..and food…….and hugs.

This world is full of all the colors.

This land that we are gifted to be on such a short amount of time…..it’s filled with REDs and BLUEs, yes….but also, Oranges, Yellows, Greens, and Purples. Some days we identify with one color, other days another.

That’s what I’m thinking about today, anyway. I just thought I shared that with you.

So, if you don’t mind….I’d like to show you the pretty Hexie Temperature Quilt I’ve now completed 10 months of.

2 hexies for each day….one for the high temp and one for the low. All Temperature readings are from Oshkosh, Wisconsin. Here’s the Legend to refresh you memory, if you need it:

And this is what January 2020- October 2020 looks like in Temperature Hexie Form:

It’s beginning to noticeably cool off in Wisconsin….so you’ll see the greens are making a comeback.

October’s row has been super fun and interesting for me since it’s run the gamut of mid 20’s to above 70…so that means LOTS of color variation!

So, if my little speech up top didn’t help to put you in a kinder, safter, loving space…..I HIGHLY recommend turning on a Hallmark Christmas Movie 🙂 That’s what I’ve been quilting to this month!

(You can see my movie reviews here if you haven’t already)

And now here’s something that you’ll all enjoy!…..the WATCH ME GROW portion of this post.

On to November!

May it be filled with all the reminders of your blessings, and may you take the time to be truly grateful for them ❤️

Sewing

Itzy Knit Dress: Pattern Review

It’s been a hot minute since I’ve posted a pattern review…..but I couldn’t let this one go unnoticed!

It’s everything I love about creating a beautiful, one of a kind, piece of clothing.

First of all, it’s written for KNITS! That means COMFY AND SOFT to my kids.

My favorite part, though….it’s the Ultimate Scrap Buster! This also makes the possibilities endless when it comes to mixing and matching fabrics! (And if you’ve been around here long, you KNOW that’s my jam) An added bonus for kids…it’s a knot closure, so it will last a LONG time as far as fit, because it will grow with you!

This was the first version of the pattern….it’s got a little bit different look, due to some measurement changes, but I love it so much, I still had to show you!

If you need this Pattern in your life (and you do) You can find it here at Create Kids Couture ….better yet, it’s on sale this first release week!

I’m so excited that Itzy Released today! Think I might just have to make another one!

Crafts & DIY · My Hallmark Obsession

Fill the Truck: Fabric Daffodils

Today I am struggling.  I’m struggling with patience.  I’m struggling with negativity.

I’m basically driving the whole Struggle Bus.

In short: I’ve got a bad attitude.

So, I thought I’d make something pretty.   (that didn’t involve masks)

Do you remember my Hallmark Inspired Truck that I keep out all year long?  Well, it needed something SPRINGY!

I meant to have at least two other Fill the Truck posts in between my Shamrocks and this one, but….well, quarantine life.

Alright, enough ho-hum…let’s get to some pretties, shall we?

I found a really cute, easy tutorial for fabric daffodils HERE from Crafty Staci  She gives you three ways to make them.  I followed one tutorial for the first one I made, and then just sort of wings the other two.  Remember, my attitude today.  I ran out of patience with that too, apparently.


Anywhoodle, I used some wooden skewers and wrapped them up with fabric for the stems….

HOT glue those bad boys on the back

Then, I just happened to have this cute little Terracotta pot Georgia painted for me back in 2018.  (says so on the bottom)

And for the dirt?  A rolled up brown sock that is one of a million without a match that I have piled in our guest room.


See, Who needs to run to the craft store to create something new?

Well, I might not NEED to…..but I REALLY REALLY REALLY cannot wait to anyway.

Also, I need to catch up on my Spring Fling Hallmark movies! (Perhaps that will lift my spirits?)

Have you been watching???

Sewing · Tutorial

Make Your Own Boo-Boo Bags (Rice Freezer Bags)

My kiddos and I don’t start our Homeschool Journey until next week, but that doesn’t mean we haven’t had lots of learning happening already.  In fact, I want to remind all of you out there in the Internets: I love seeing everyone’s schedules and ideas/tips/tricks/fun, and I will be sharing ours….However, please remember:  WE ONLY POST THE HIGHLIGHTS! I’m not sharing to make you feel bad because you didn’t let your kids so nuts with corn starch mud….or make a scavenger hunt for them….or to make you think I’m not losing my mind like the rest of you.  I’m just trying to stay positive.  We all need a little bit of that right now!

So, let’s see.  Our family of 6 have been “Social Distancing” ourselves since Friday.  We are on Day 7.  Since then, we’ve had 17 cases reported to be in need of a Boo-Boo Bag.

A Boo-Boo Bag?  It’s what we call our Rice Filled Freezer Bags that can be used on “OWWEEEE”s.   And, I am telling you, they are so easy to make, your 7 year old can do it!

Supplies Needed:

Cotton Fabric, Rice, Sewing Machine & Thread.  (Optional: Essential Oils for “Smell Goods”)


I hope you don’t mind…I’m not going to be super specific with measurements.  It really doesn’t matter at all.  Use what you have…I let my kids pick the fabric they wanted….and they all turned out to be different sizes.

You are going to sew the pieces together inside-out, and so you have 3 sides closed and one side open.

Flip it right-sides out.

“Fill” with rice.  I put fill in quotes, because you don’t want to fill it all the way….I recommend about 1/2 full (or less)  You want them to be very flexible and cushion-y

Then take the open ends and turn them into the inside…..

Sew it closed.  (Make sure you back-stitch at the beginning and end)

Put them in an air-tight bag or container and store in the freezer for the next “BOO-BOO”


  • HOT BONUS TIPS:

  • Add Essential Oils to the rice for aromatherapy….you can also just drop some on bag and let dry.

  • Make LARGER bags for Adult size Boo-Boo’s

  • Use said Larger Bags as HOT PACKS by microwaving them for a couple minutes


I’d love to see if you make your own!  Please comment and show us!