Crafts & DIY

Tutorial: No Sew Braided Rainbow Rug

No Sew Braided Rug Tutorial

I don’t know who was more excited about this rug….me or my girls?

It has ALL my favorite things in it:

  1.  I was able to make it completely from supplies that I had on hand.
  2. A TOTAL Scrap BUSTER! I save every piece of fabric…from every project.  I have years of memories in my scrap bins, but a MESS of a Sewing Studio that I am determined to get organized.
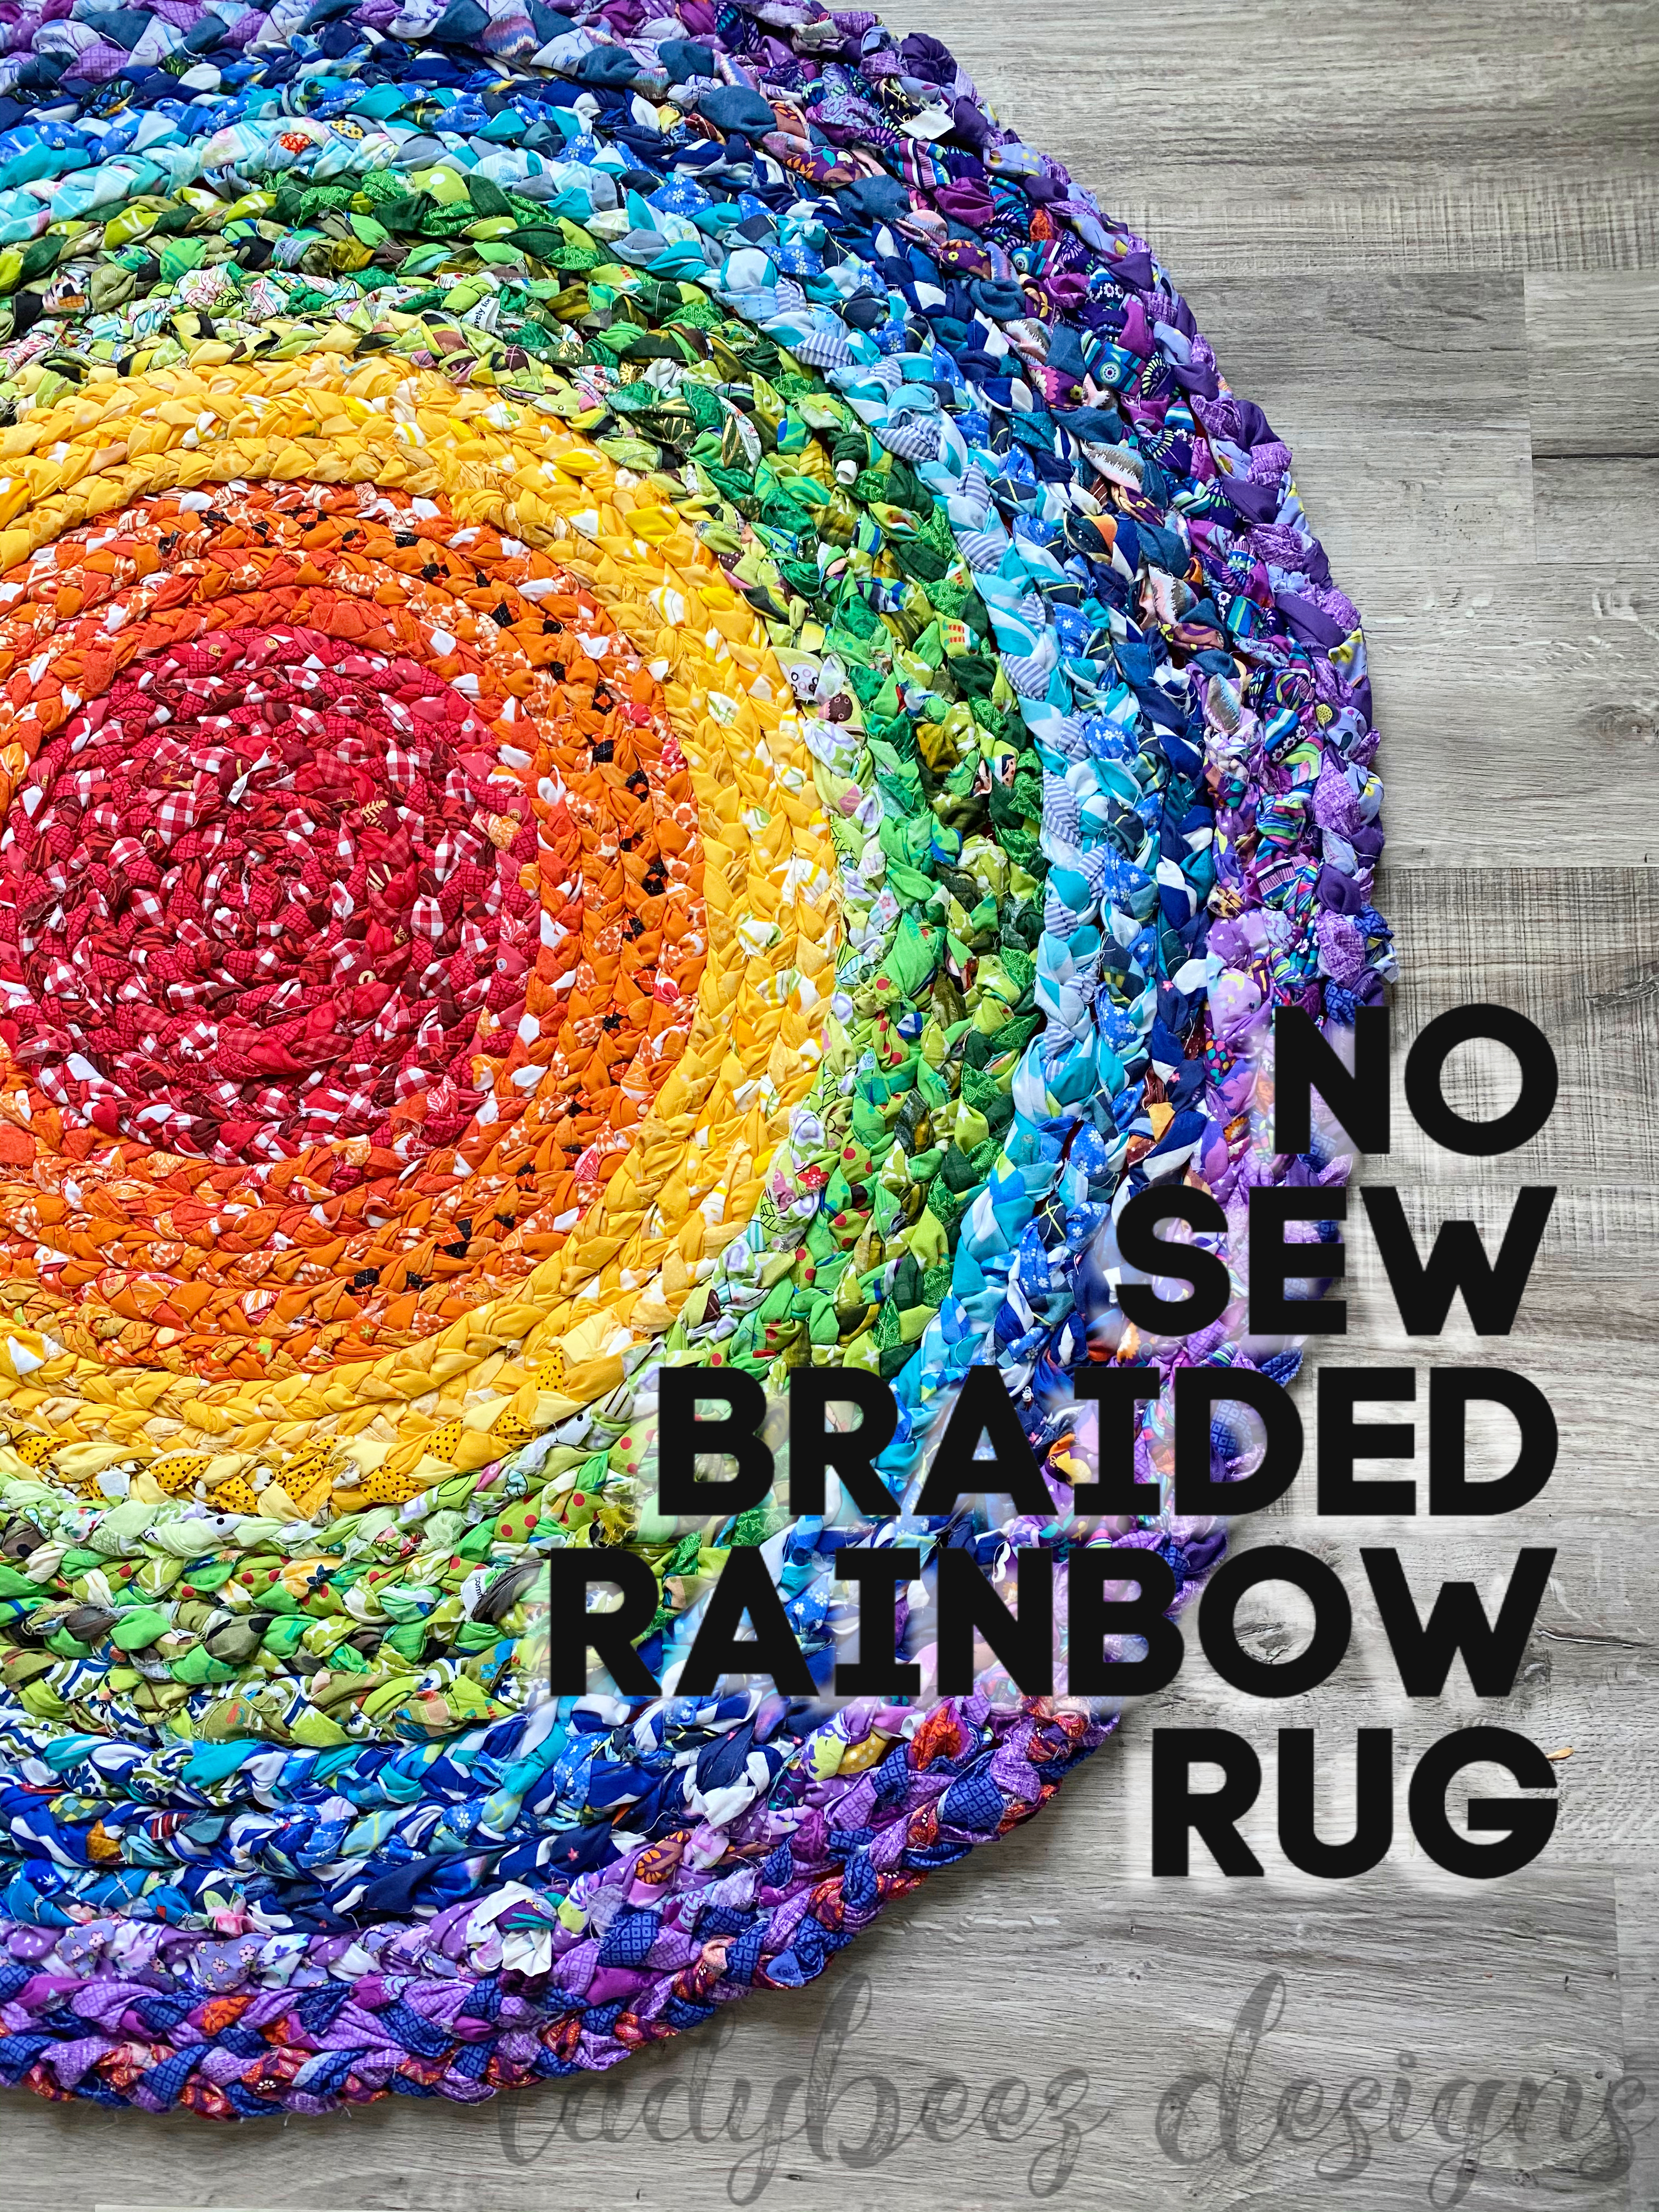
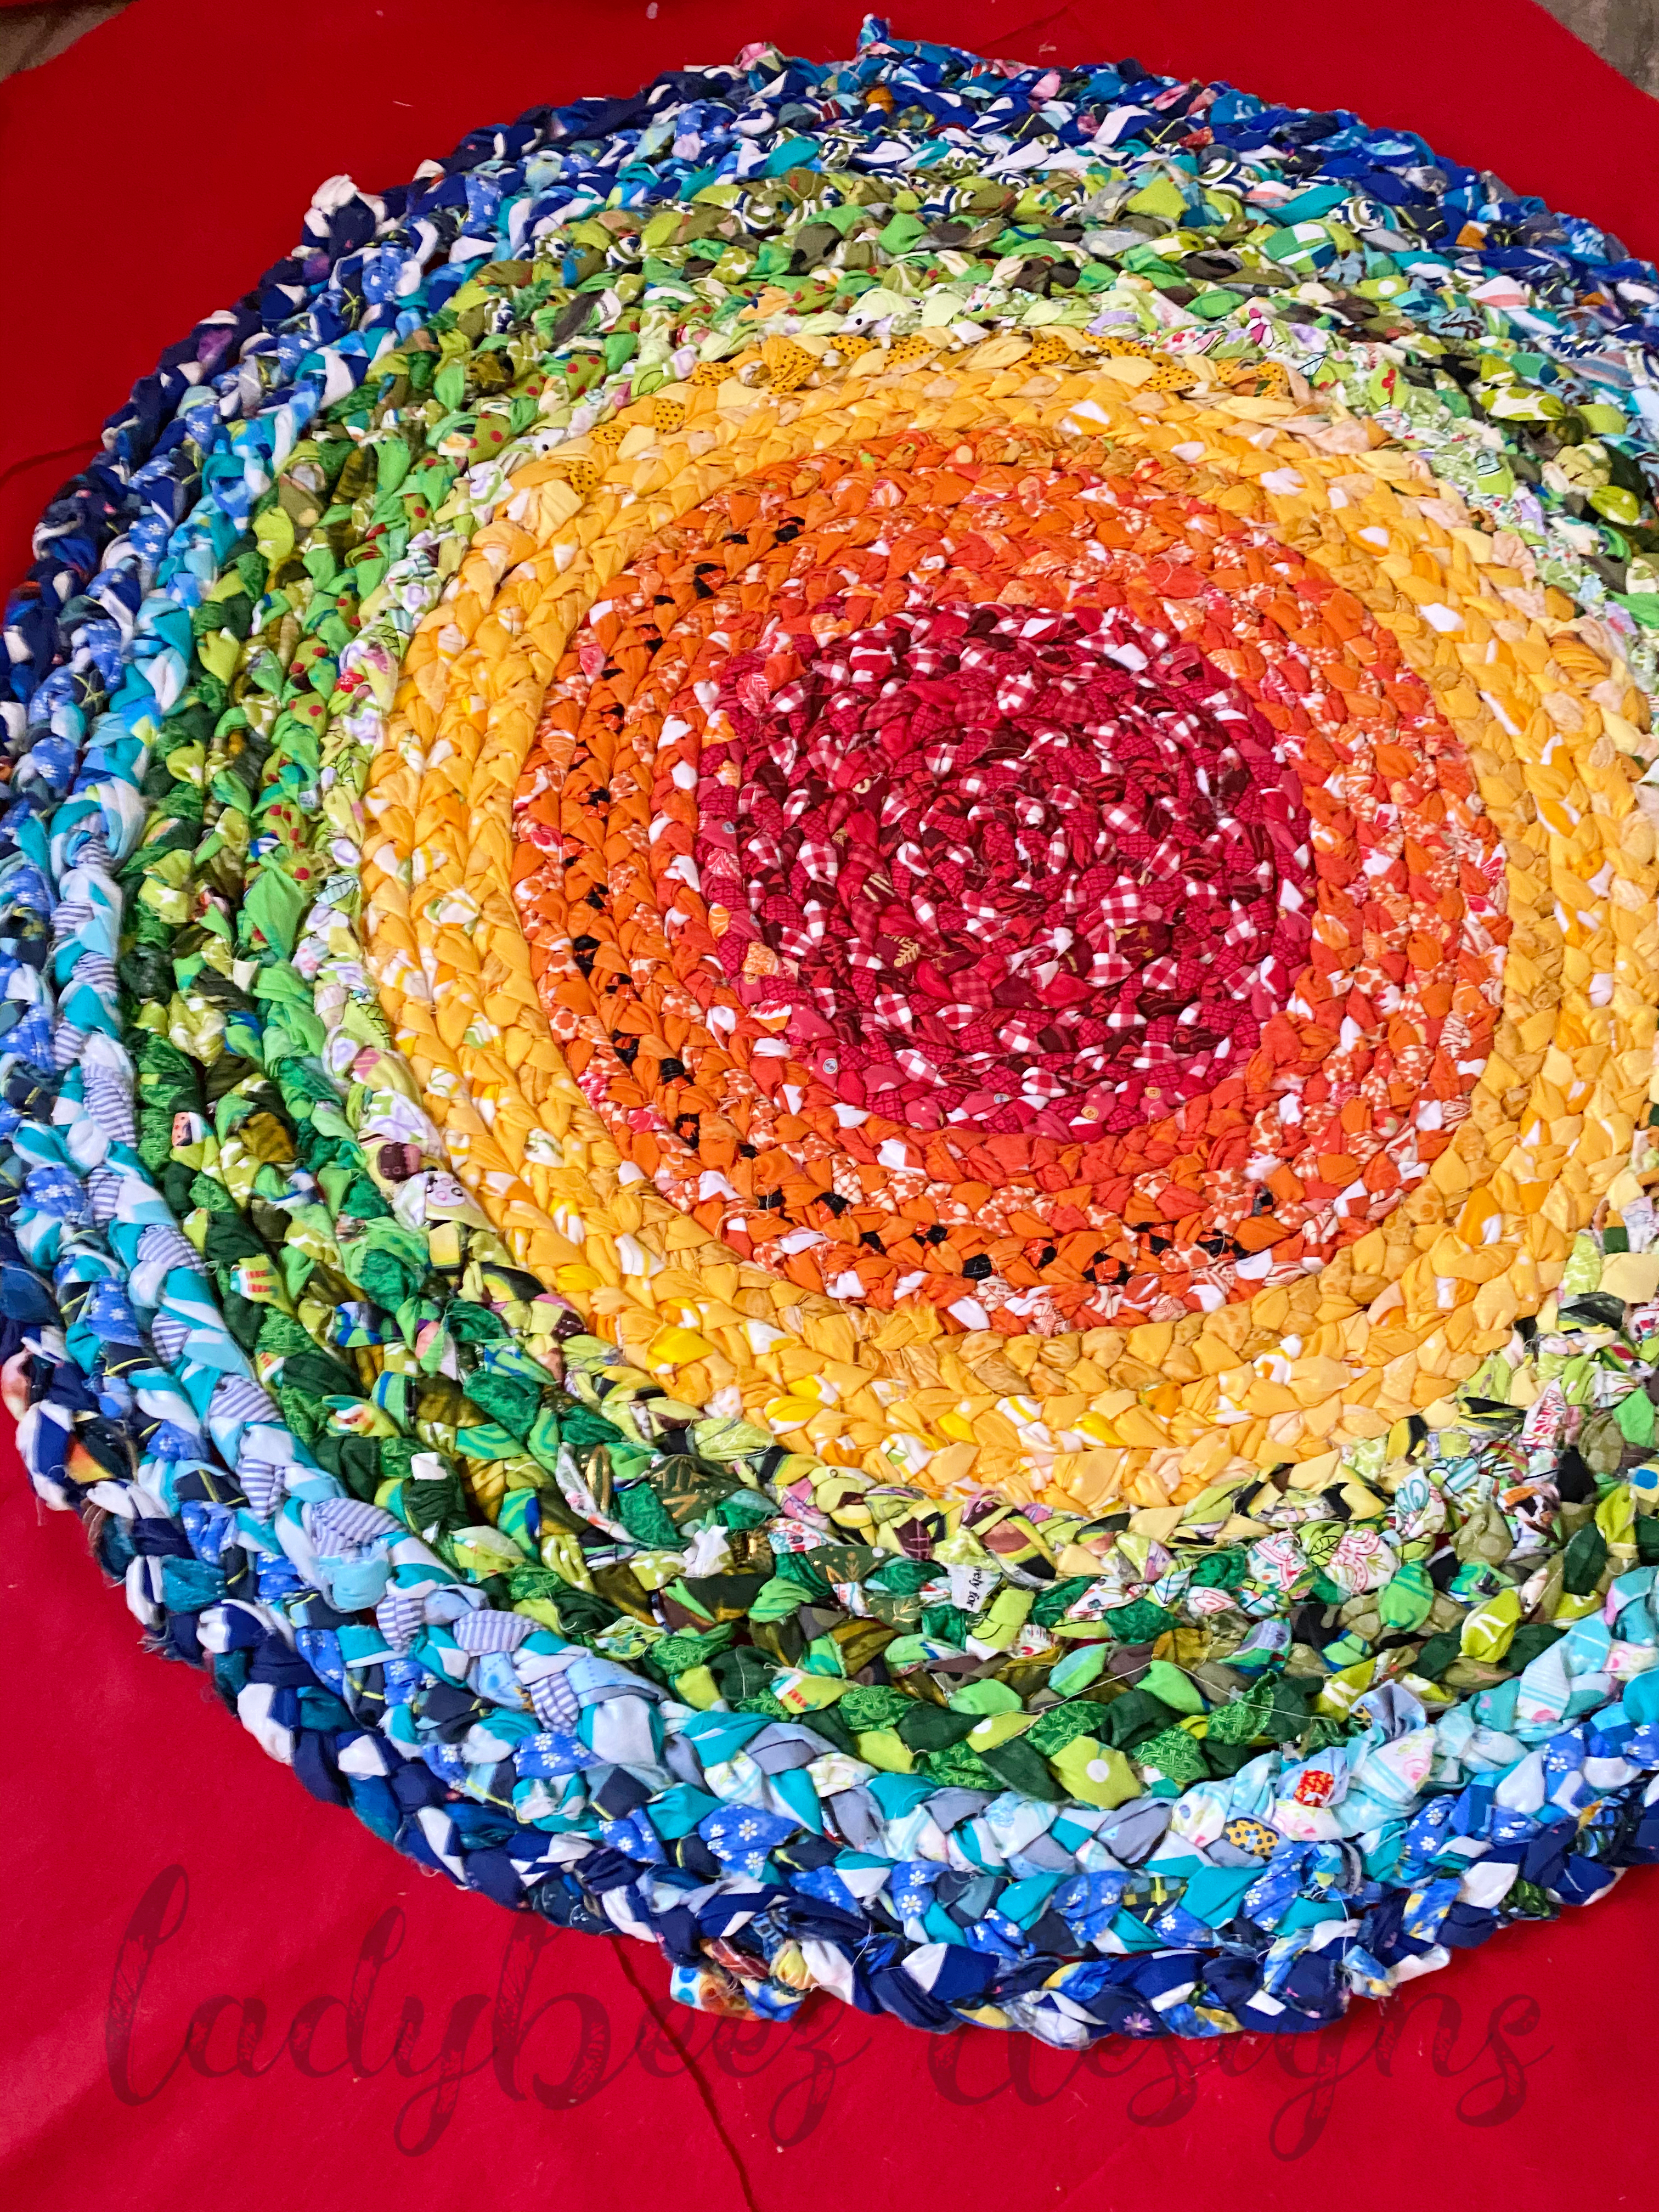
  3. It’s RAINBOW!  Every beautiful color…and it makes me smile.
  4. NO SEW! I love sewing, but sometimes a girl just wants her glue gun, ya know?

I started this over a year ago…my oldest daughter asked for a rainbow rug for her and her sister’s room.  After looking at the options to purchase a rug, I decided we didn’t need to spend hundreds of dollars on a rug that, let’s face it, someone’s going to pee spill on at some point.

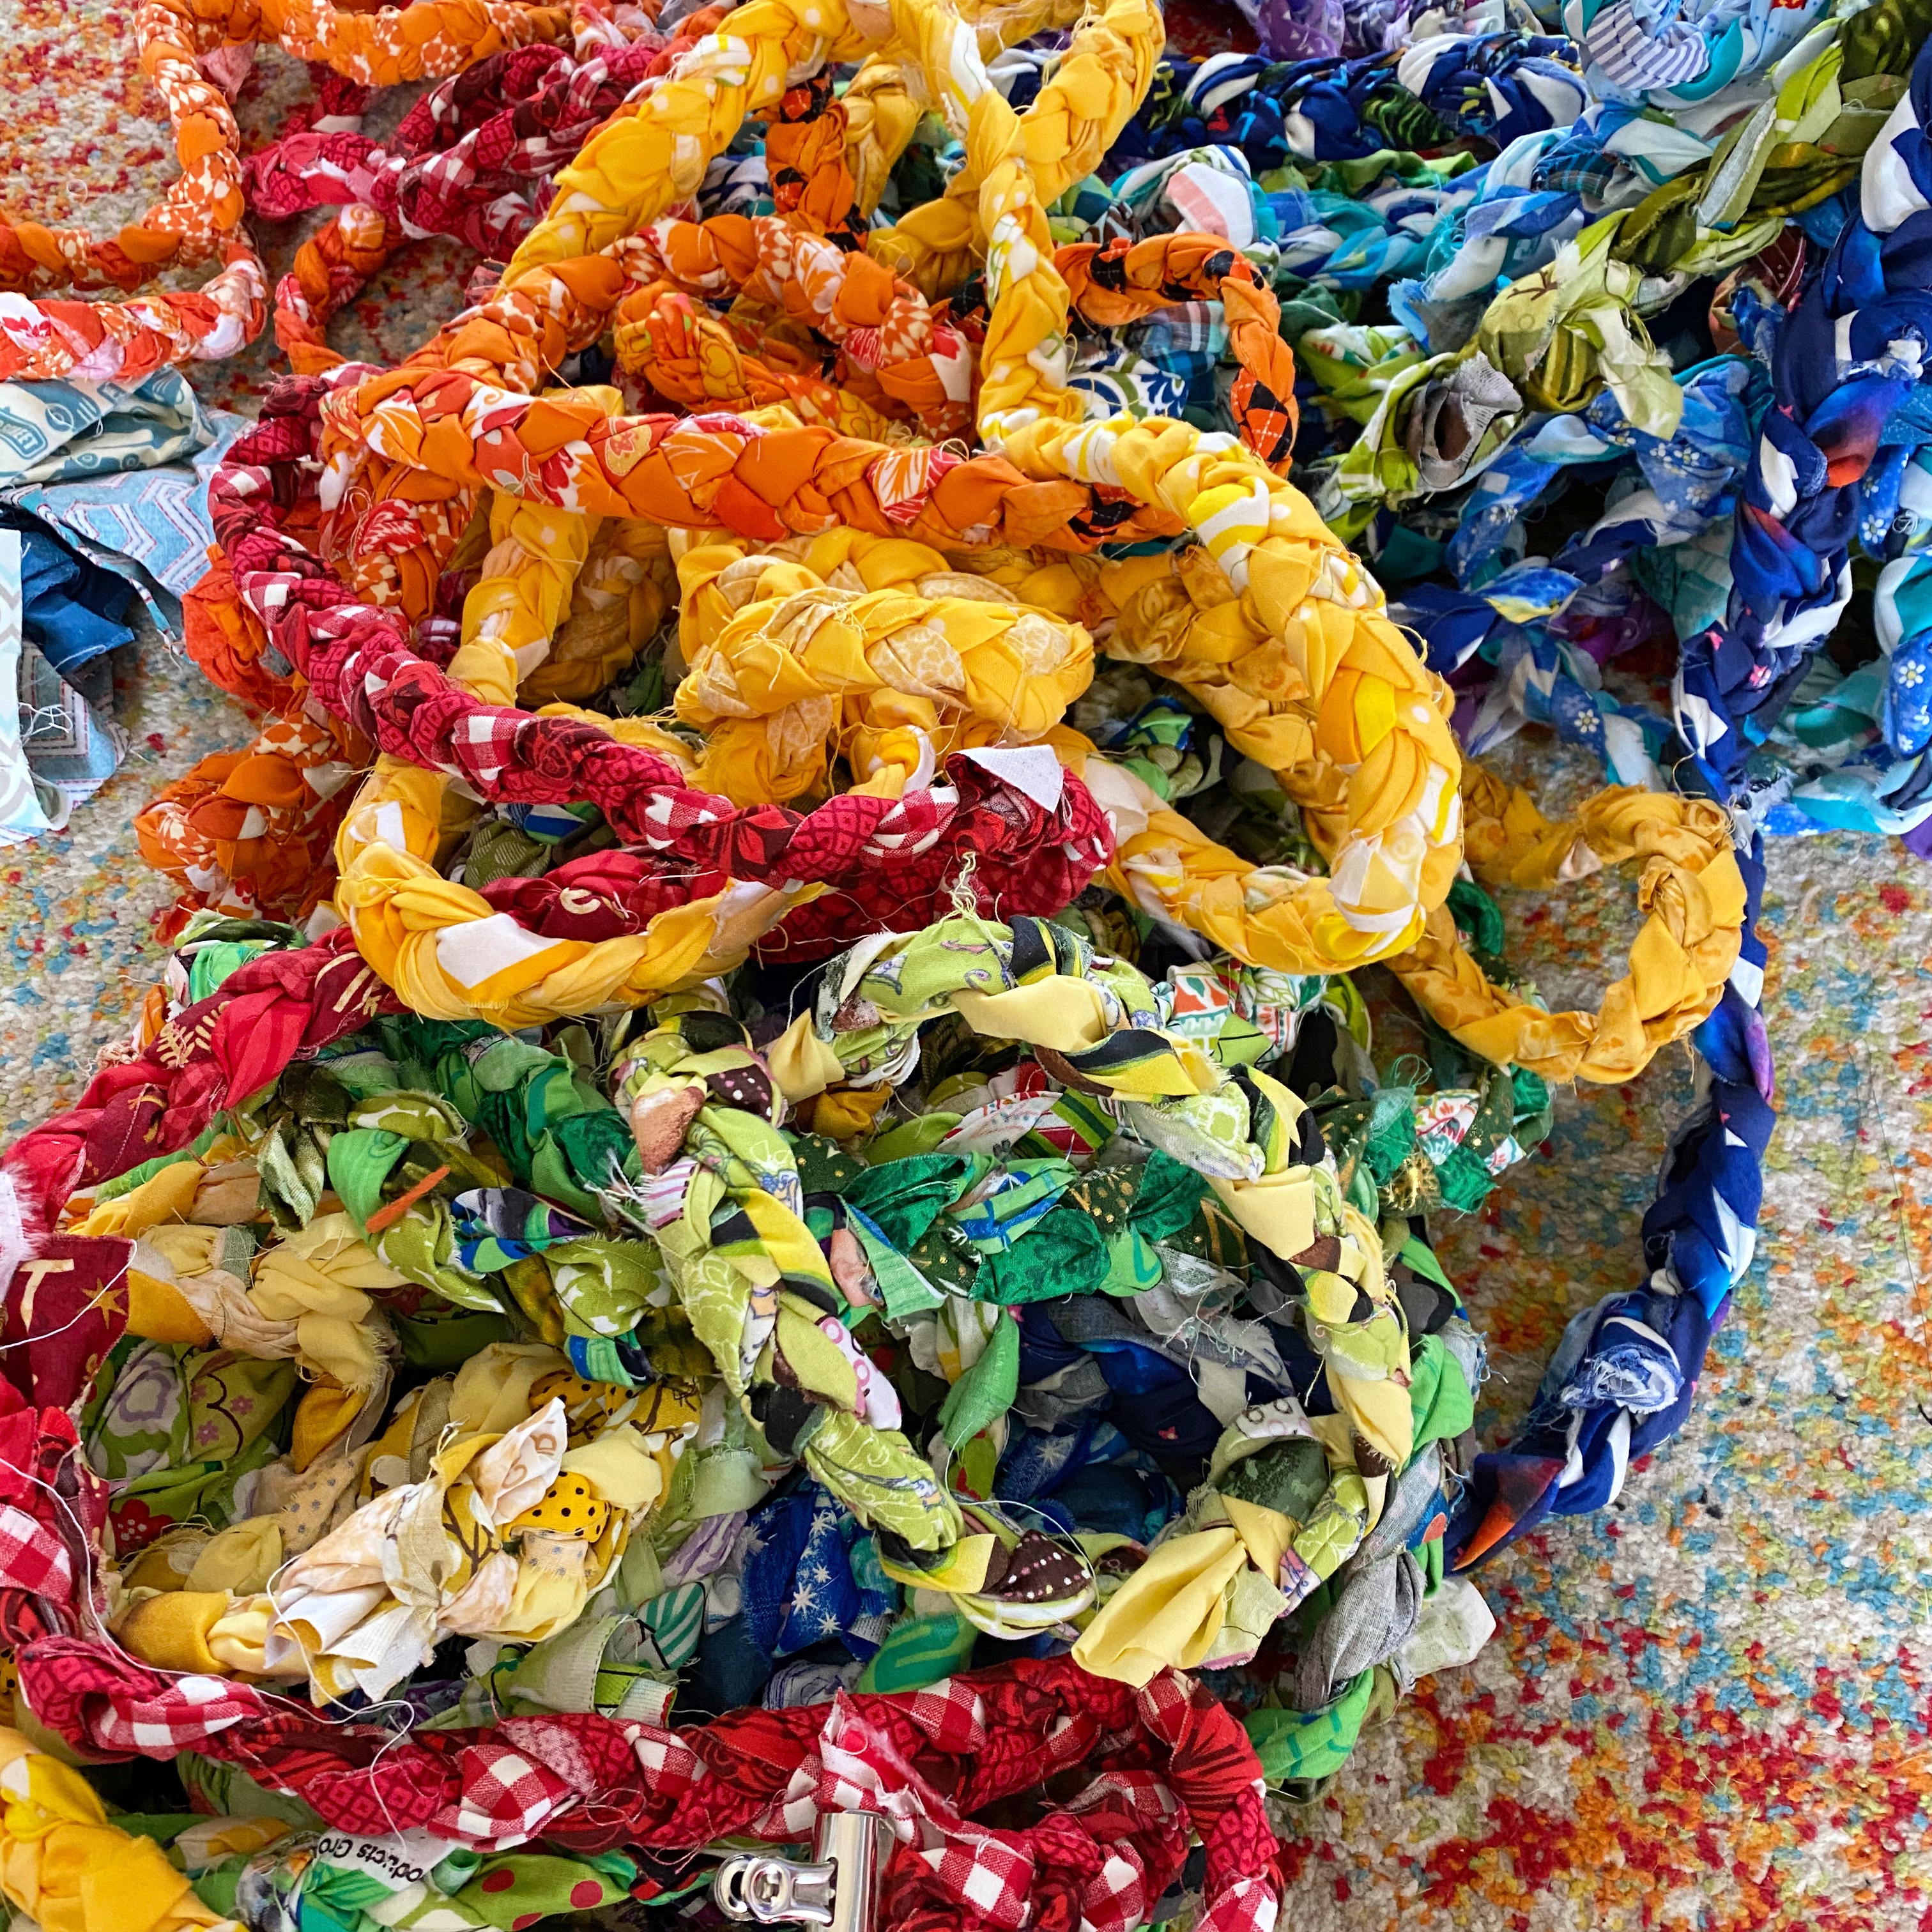
Turns out, I had PLENTY of scrap fabric that needed to be used, so off I went and started braiding.

If you have a TON of hot glue & you can braid (and have a bunch of fabric to rip up), you can make this too!

You don’t need a sewing machine AT ALL.  I mean, you could sew this together if you wanted to…but I chose to go with hot glue…you do you, I won’t judge.

Are you READY to Make one of these Masterpieces????

SUPPLIES YOU’LL NEED:
1 1/2 (or more) yards of FELT:  depending on how large you want your rug.  (Remember, I said I used my scraps, so I went with Red…I would probably go with that again even if I had to purchase)
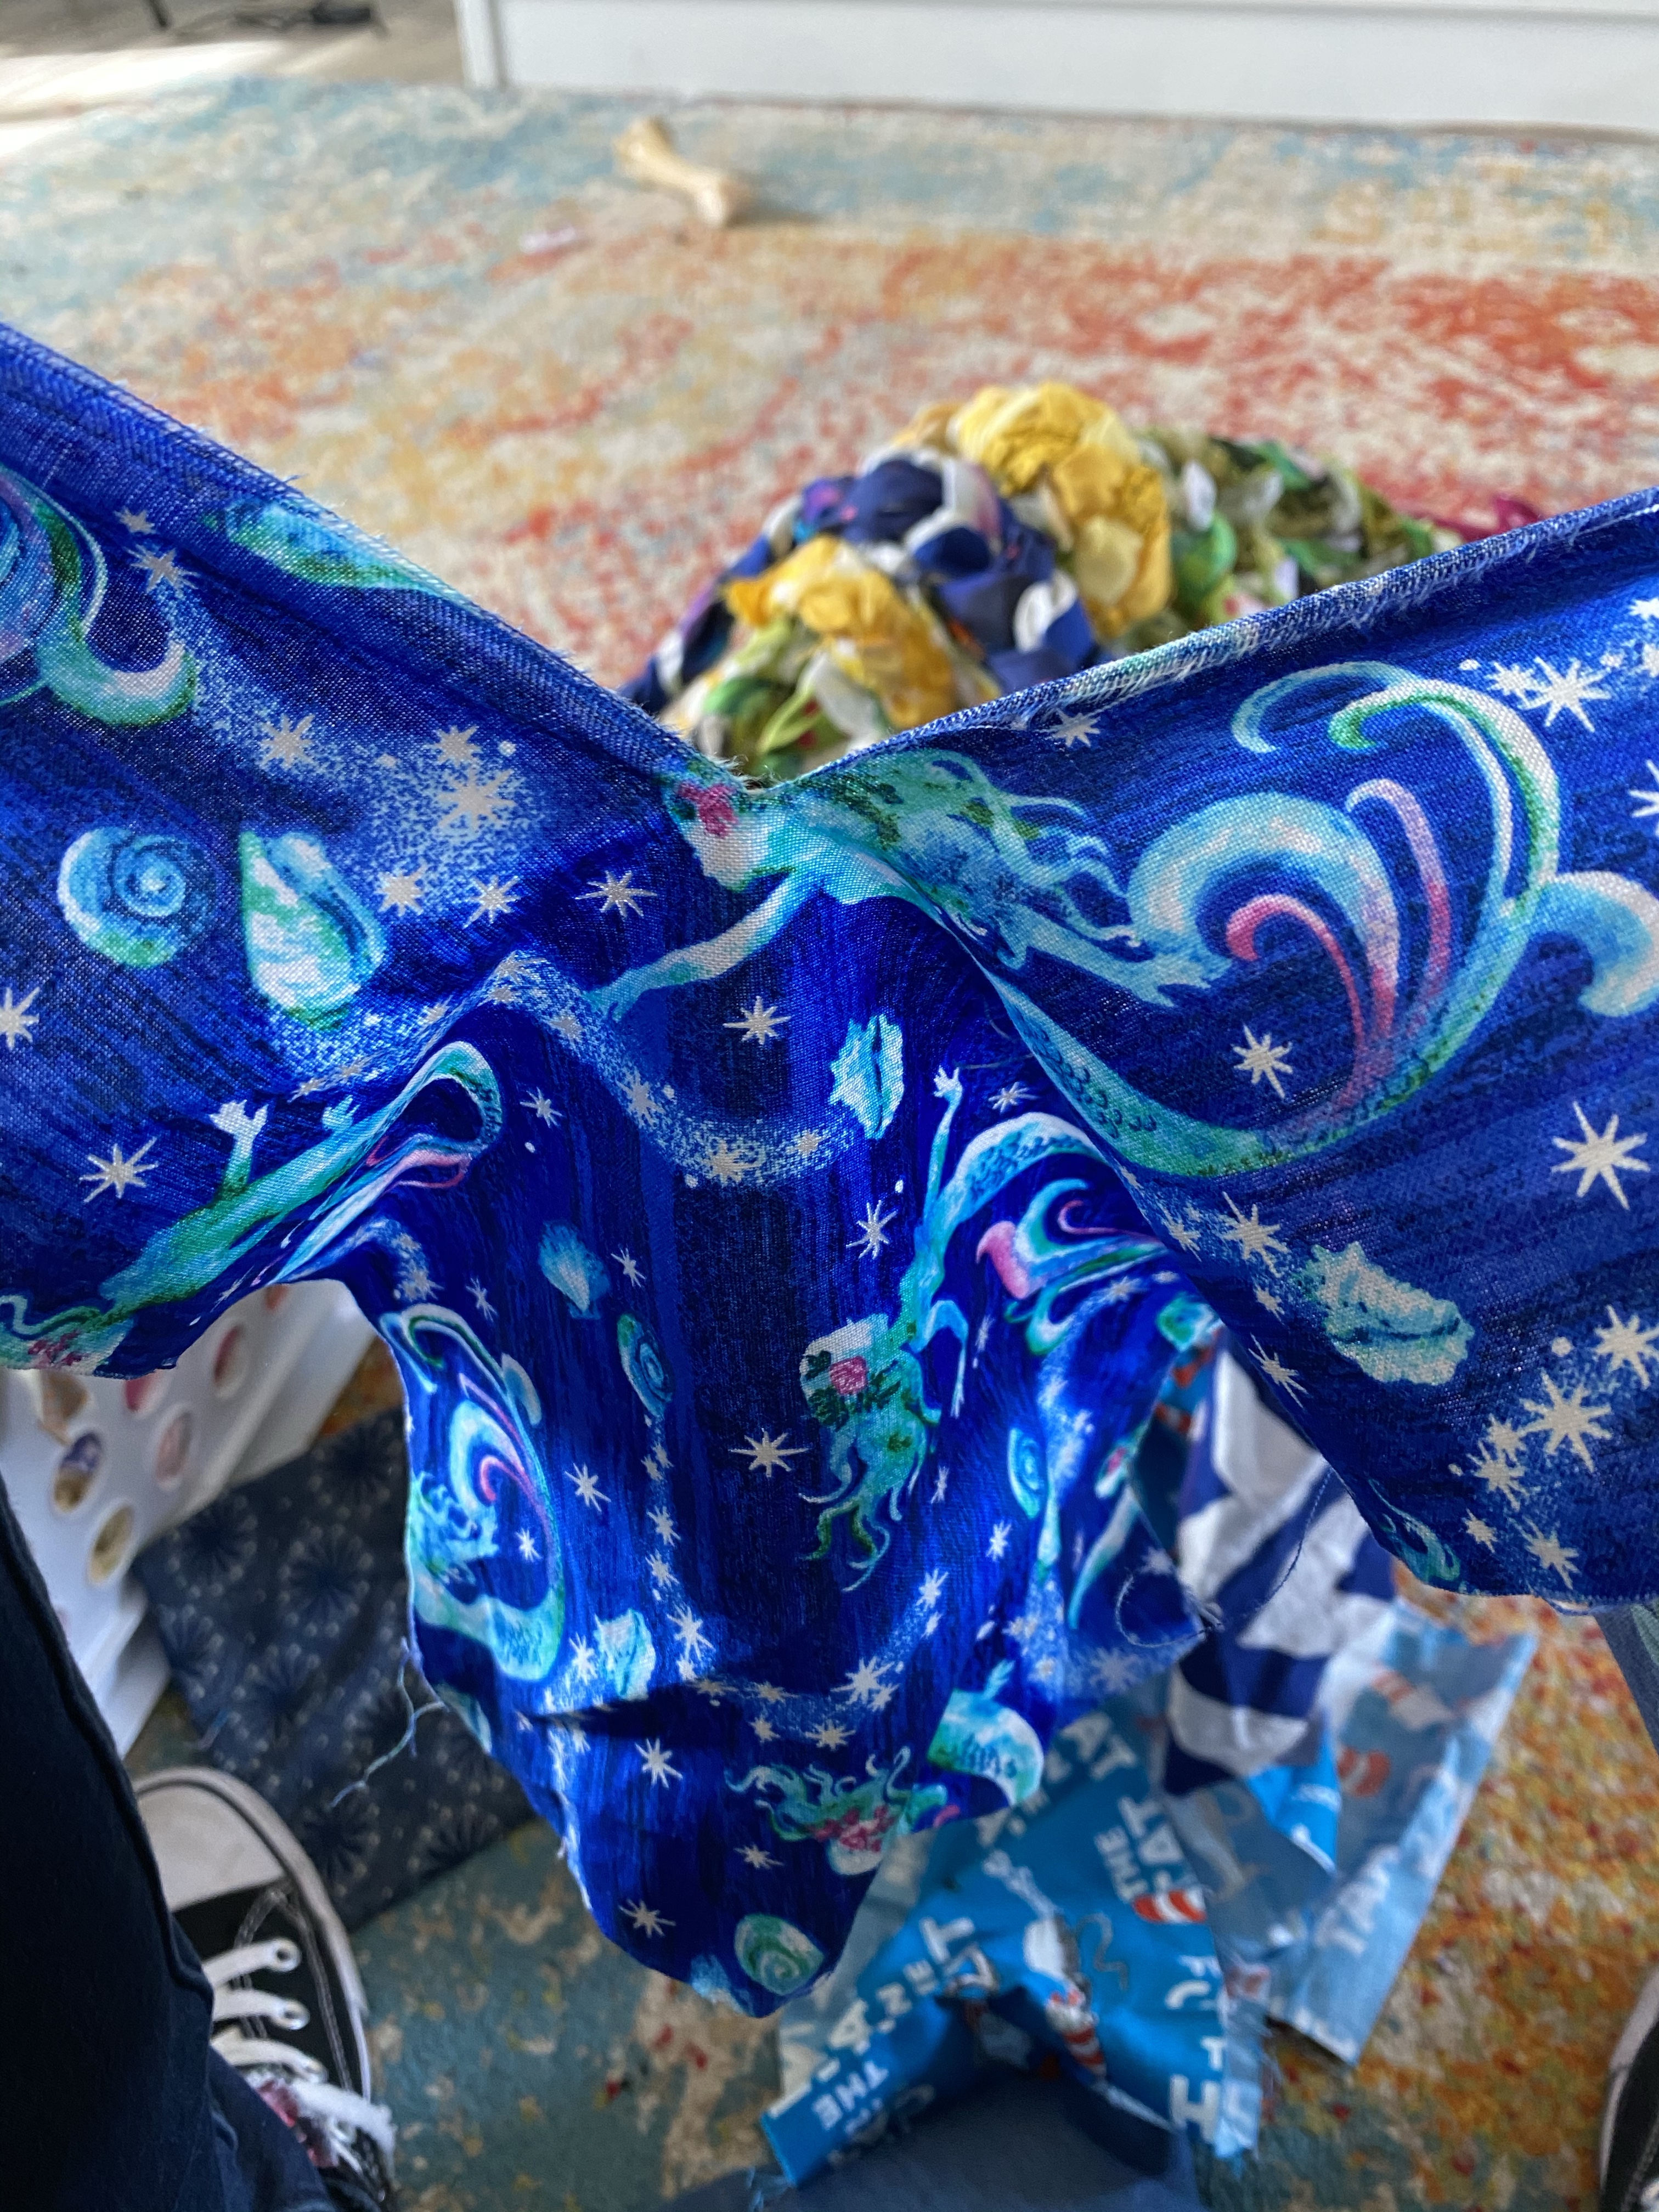
Strips of Fabric in 4 inch widths:  I ripped the fabric apart to make it faster.  BLEW my kids minds when I showed them how woven fabric rips right along the grainline once you start with a little cut.  They loved helping with this part.  Also, found it fascinating how different fabrics made different sounds when ripping
Hot Glue Gun & LOADS OF GLUE STICKS: I recommend getting the large sticks…this will take a LOT of glue .  Just make sure you grab the right size (width) for the glue gun you own
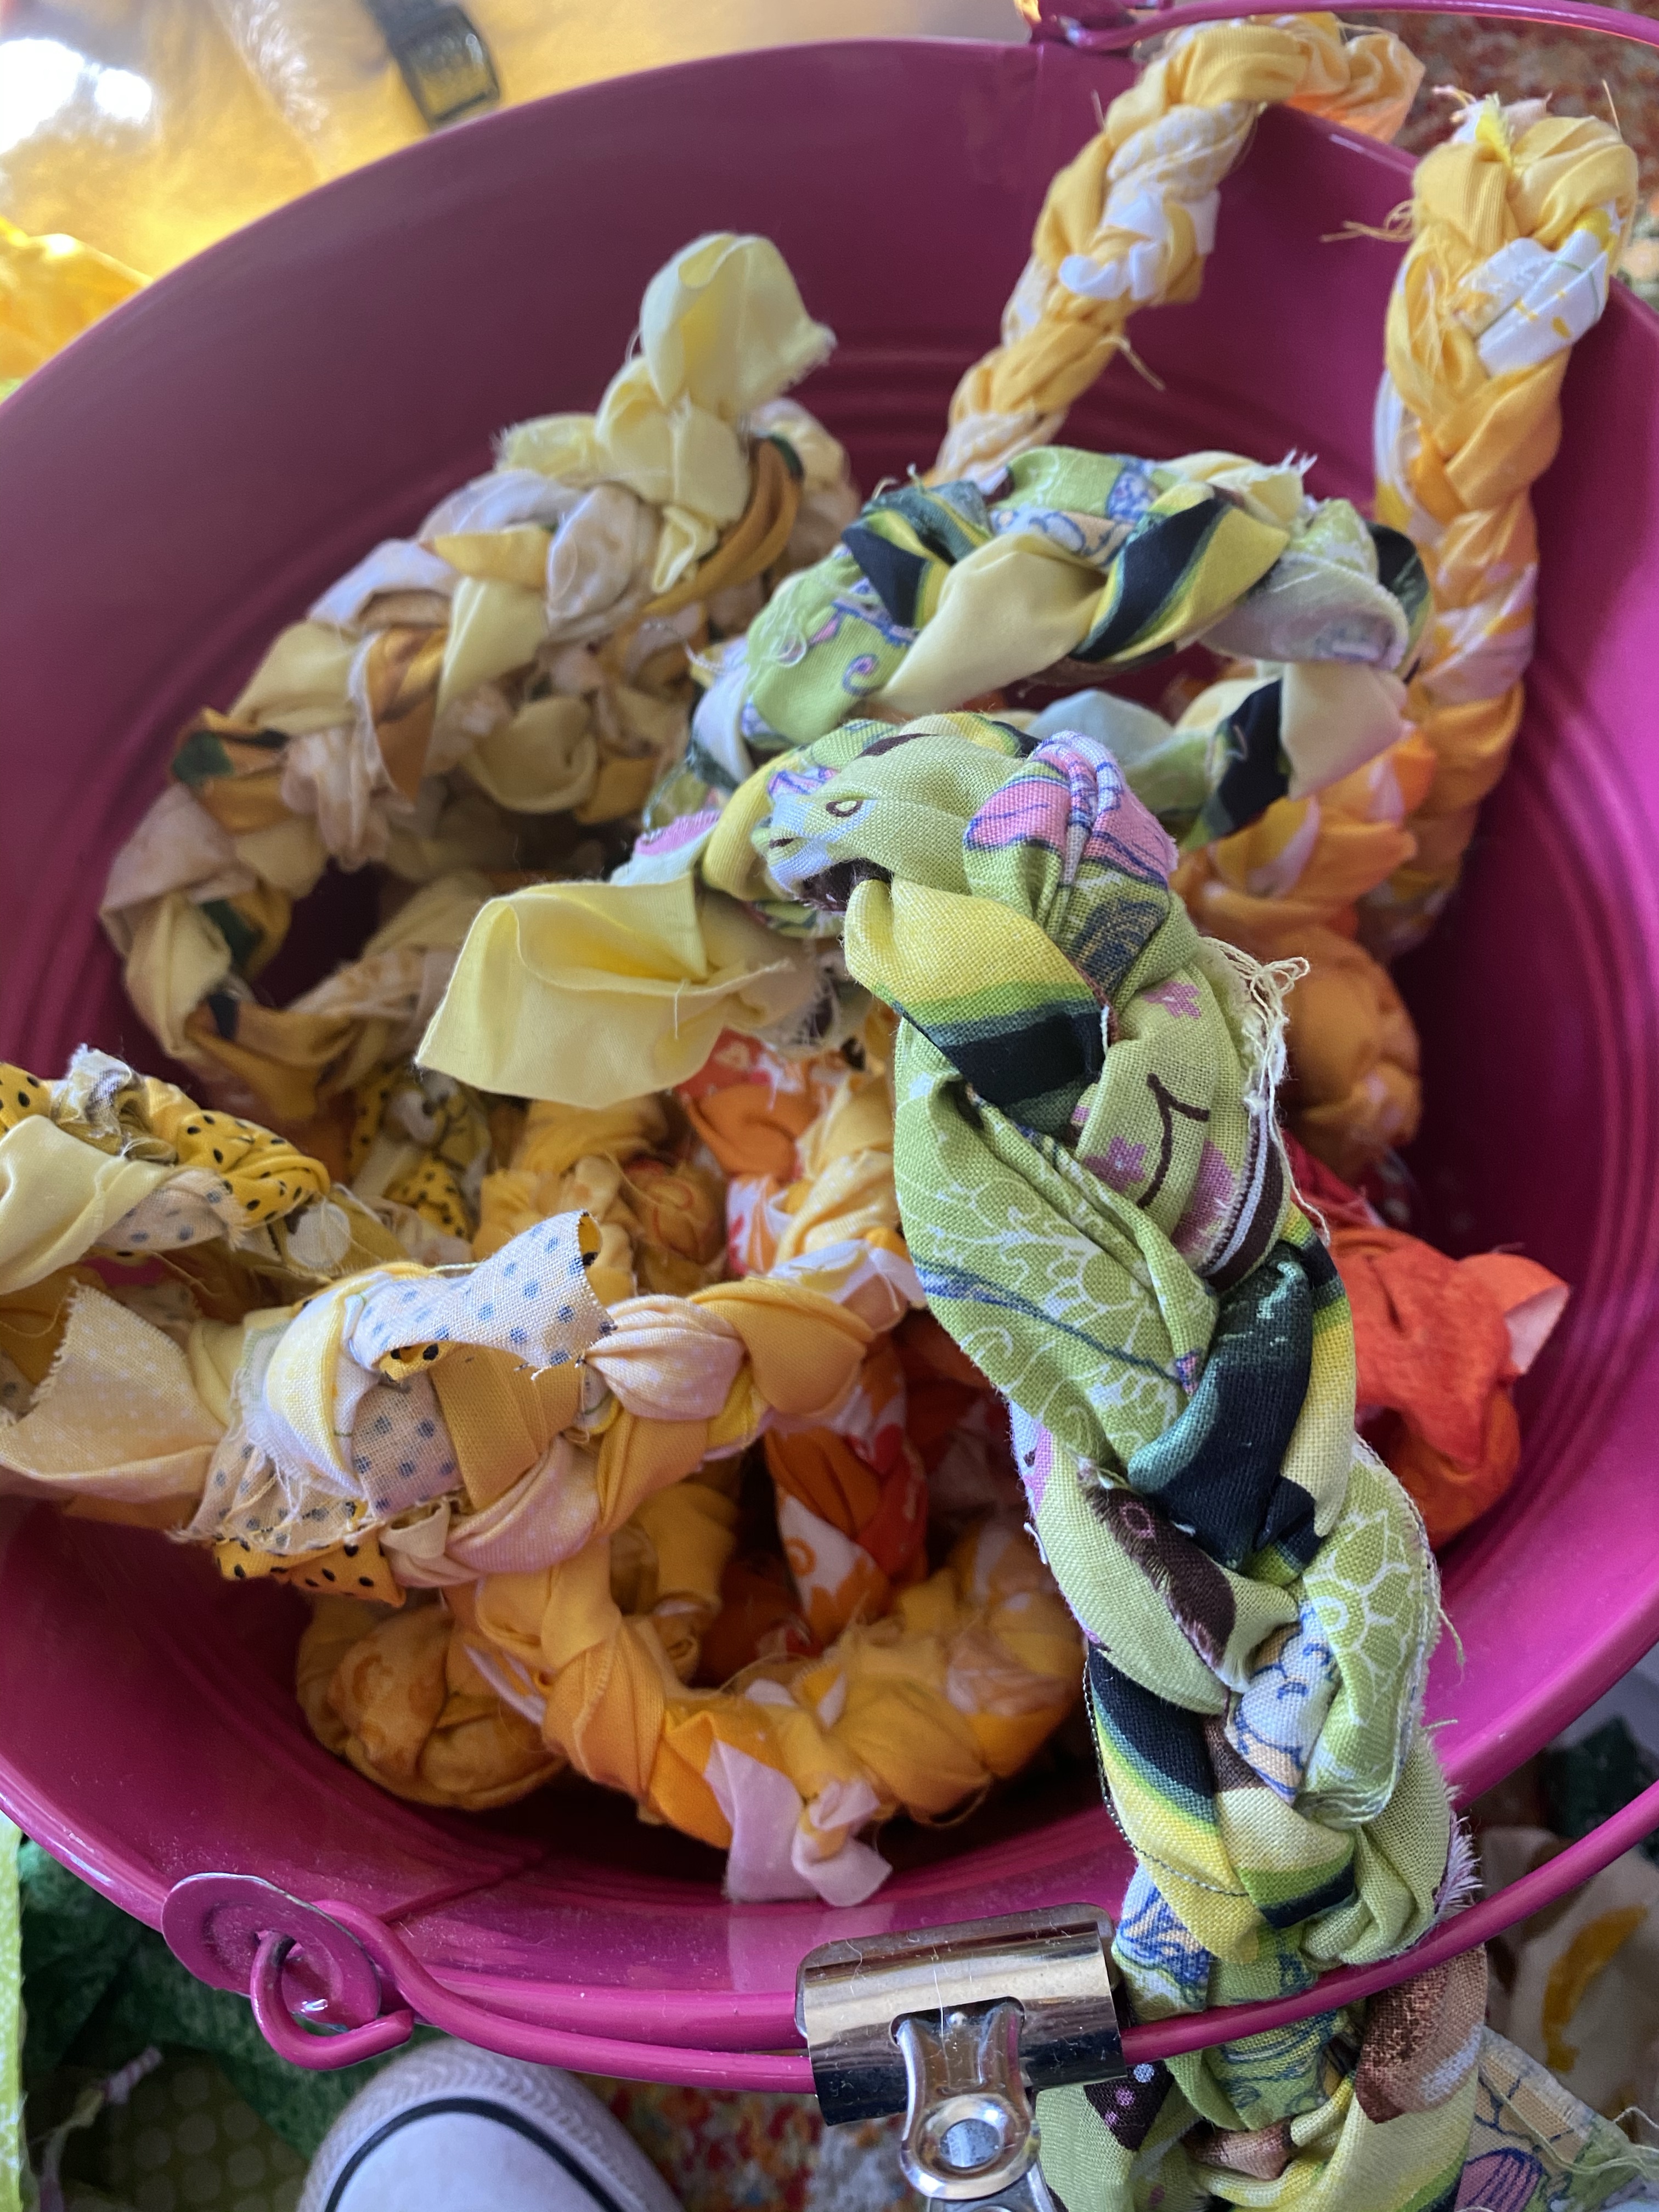
CLIPS of some SORT: to hold the ends of your braids while you work.

Let’s GET STARTED!

I’m going to show you how I made mine.  There are obviously many ways you can vary this project…that’s what so fun about the creative process!


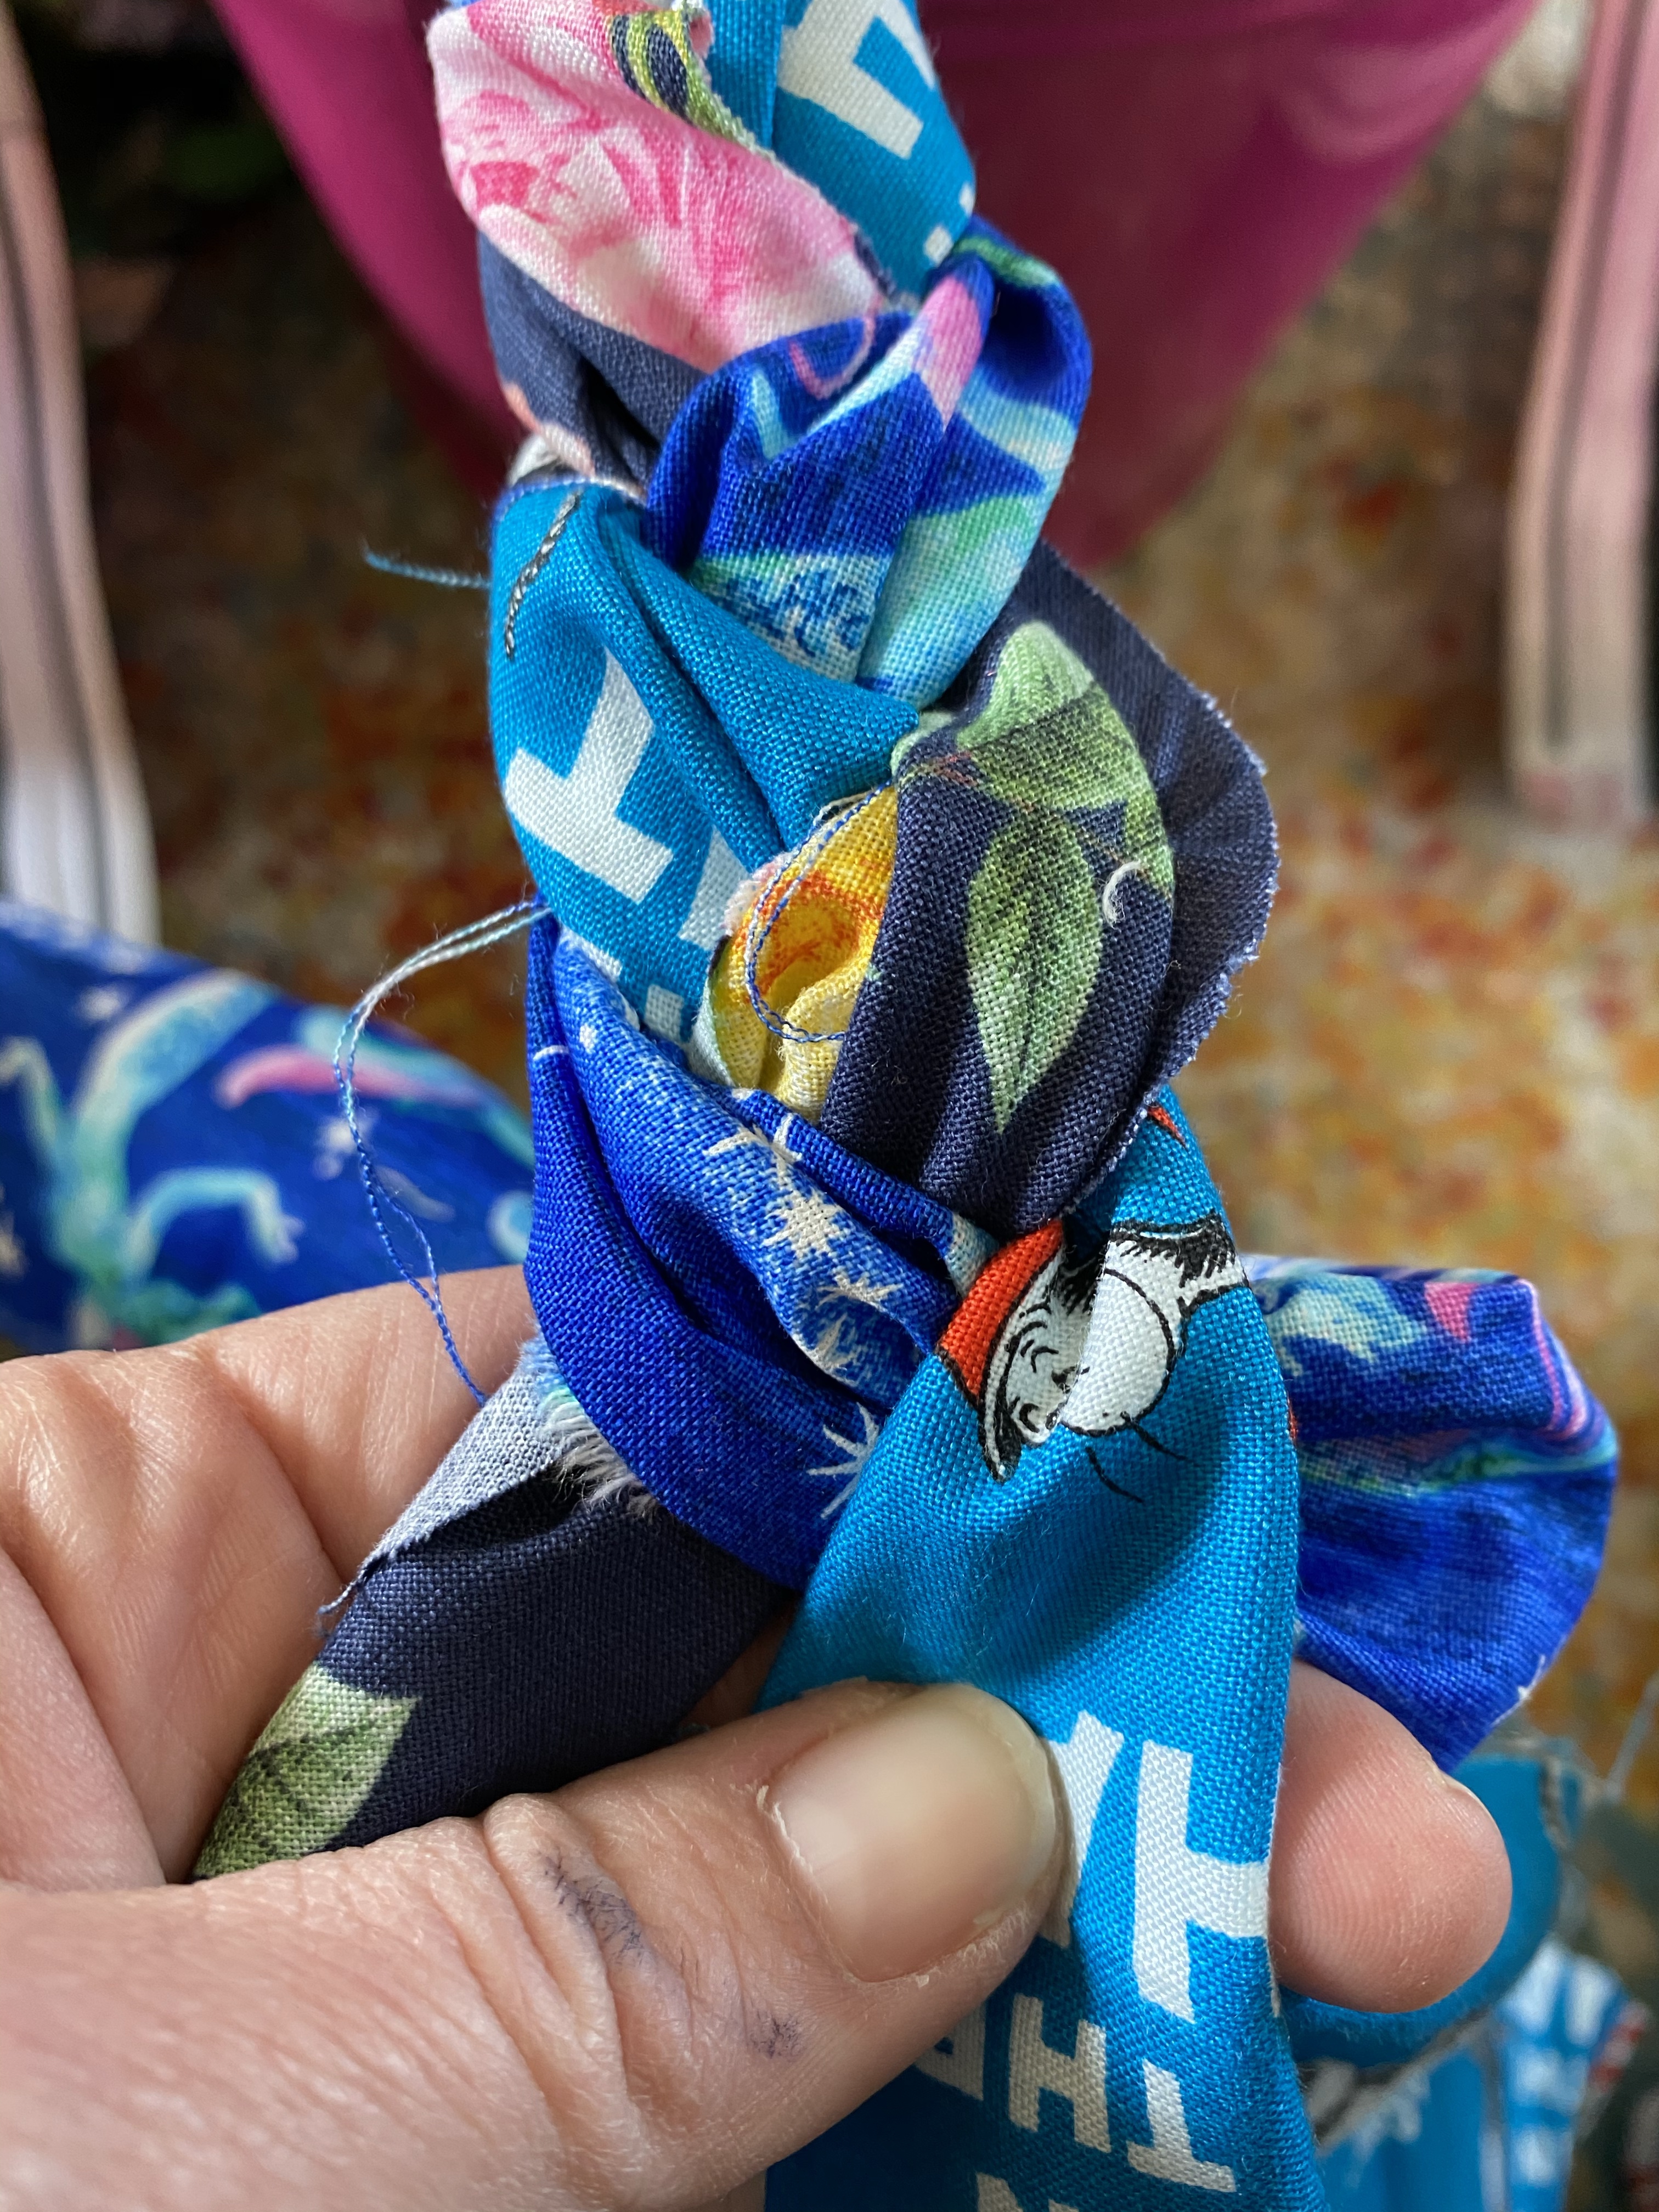
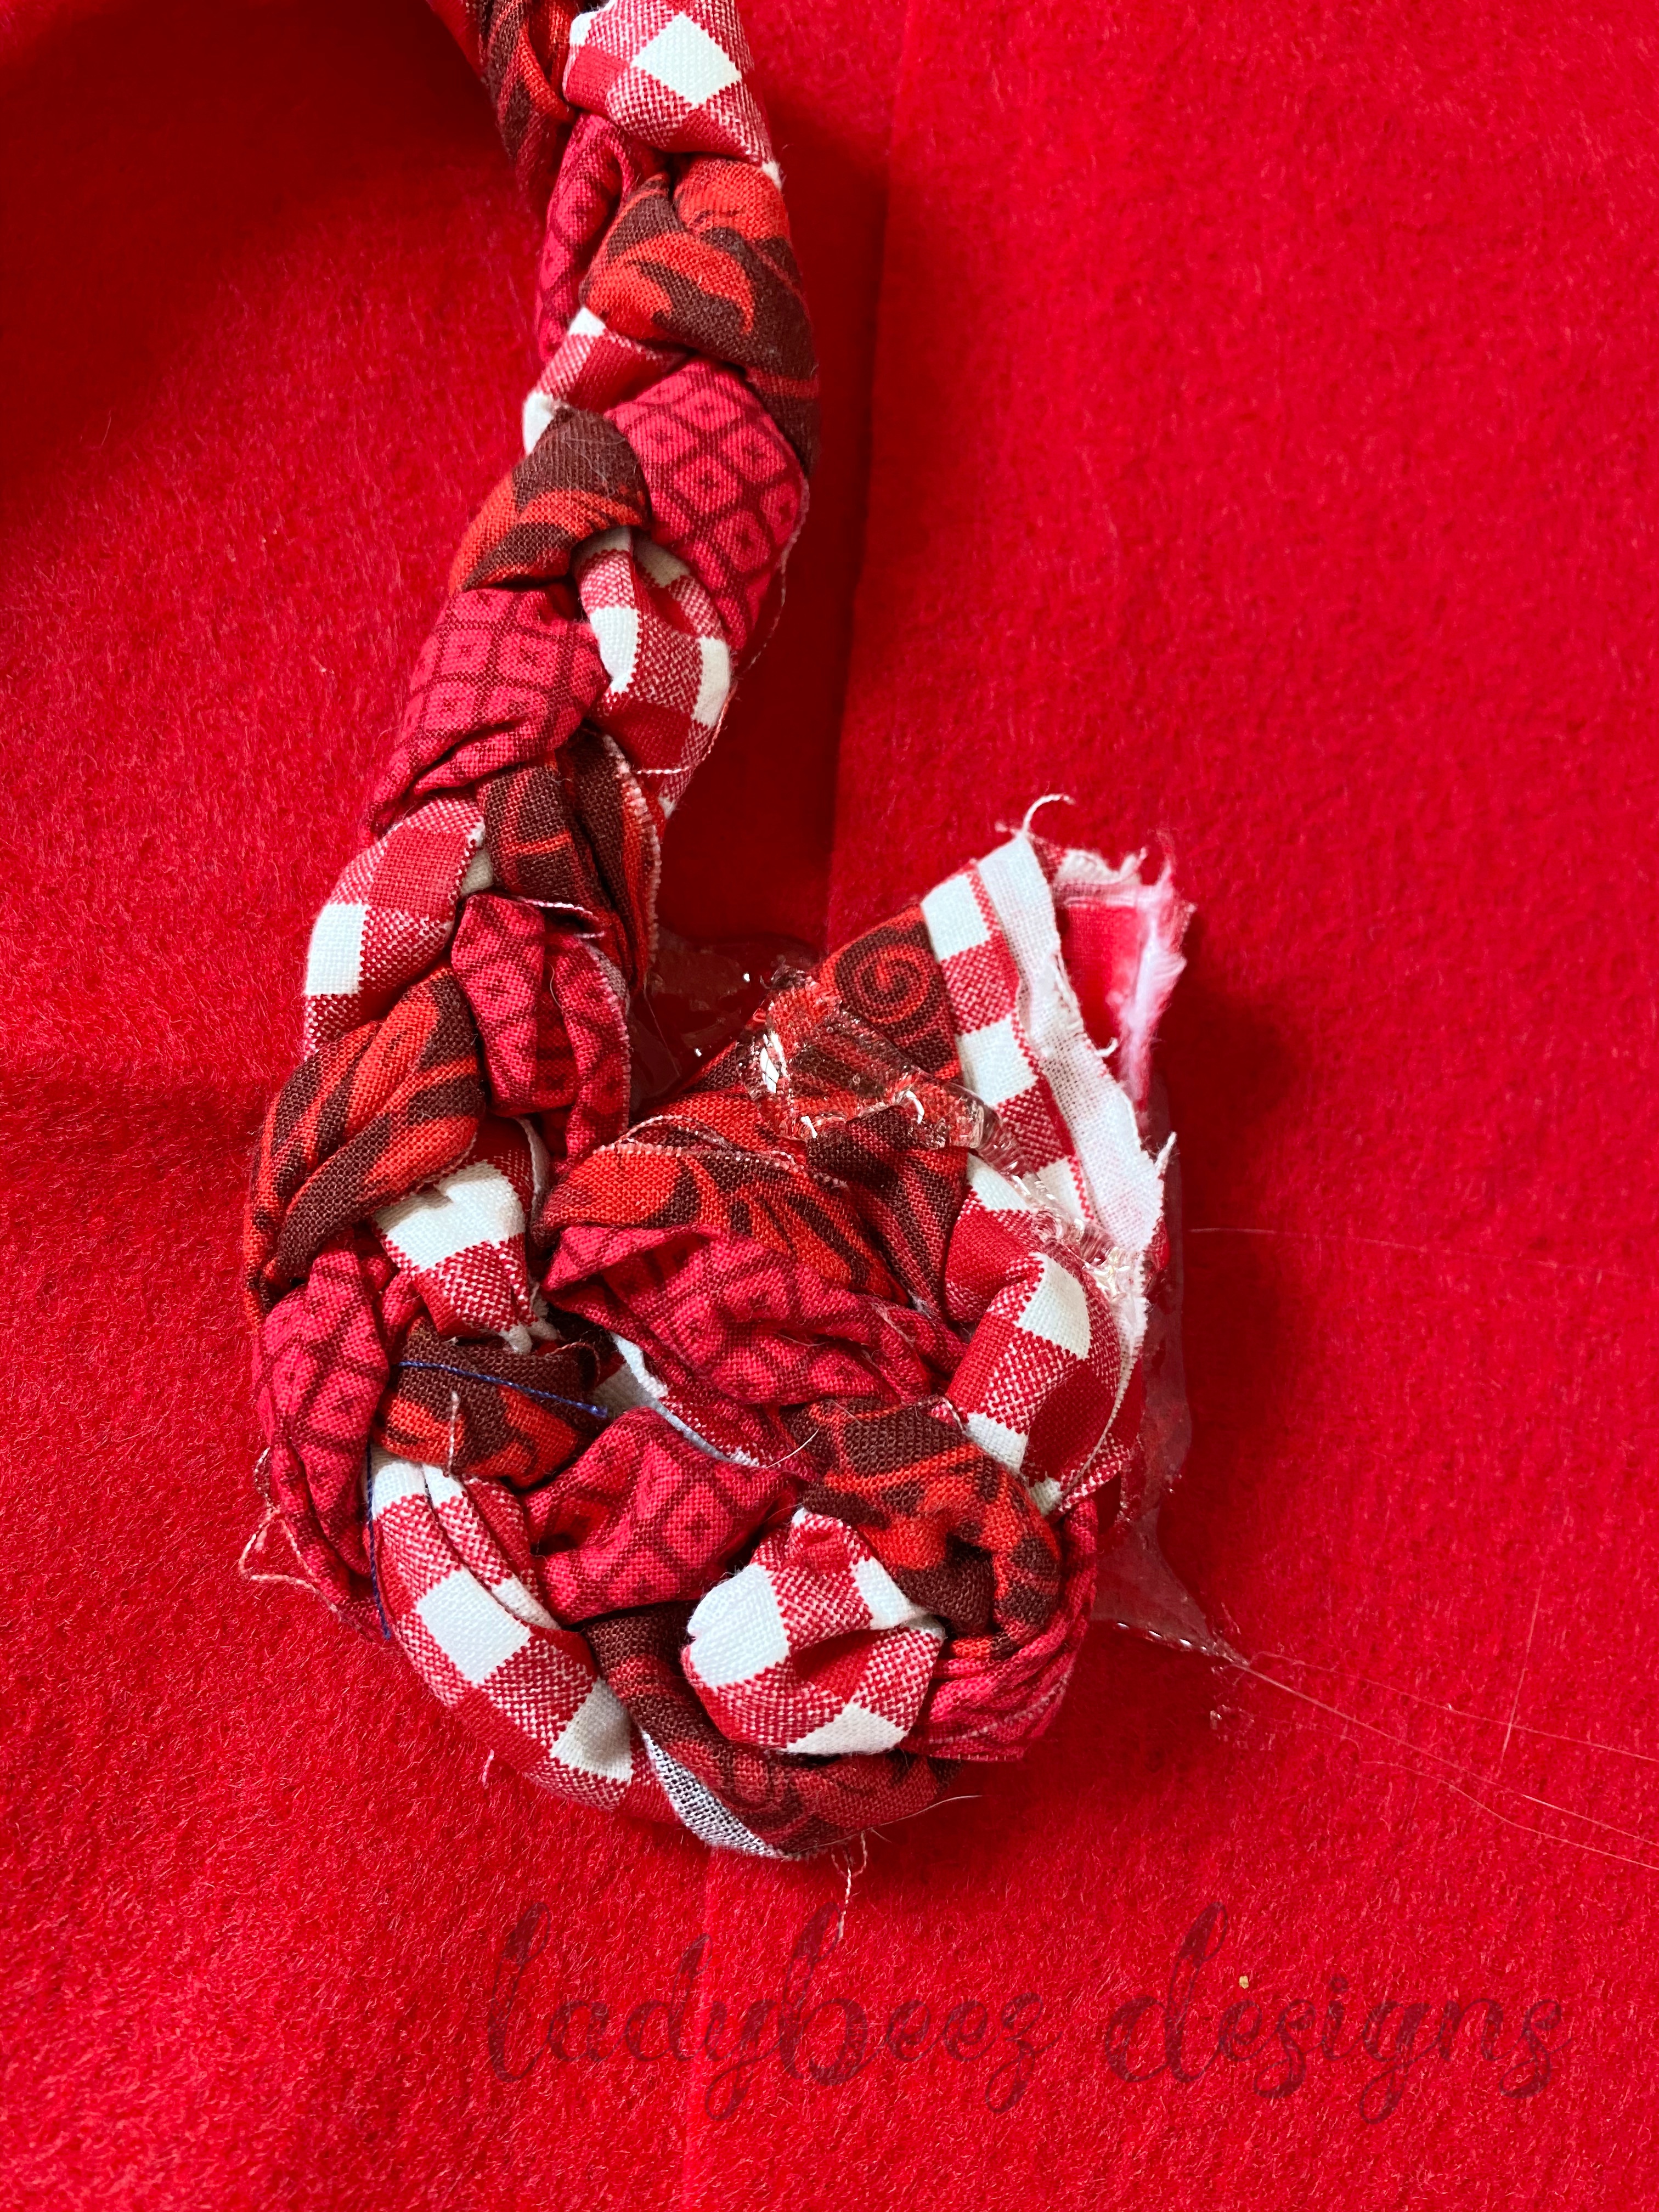
  1. Start with the RED….Cut or RIP (my preferred method) your fabrics in 4 inch widths. Clip 3 strips together and start BRAIDING! It’s actually best of the strips are NOT the same length….this is important for when we have to attach the next strip.
  2. When one Strip gets short, you’ll take another strip of fabric and tie a knot to strand them together. (if all the knots fall in the same place, it will be too bulky and harder to hide while braiding)
  3. Then Just KEEP BRAIDING, JUST KEEP BRAIDING….BRAIDING….BRAIDING….BRAIDING….you’ll braiding for days! (or if you’re like me, years!……I may have started this project before last Christmas 😉 I PROMISE you, once you get into it, I won’t take that long…in fact, you’ll be able to see where I left off and where I picked it up when we get to that part.
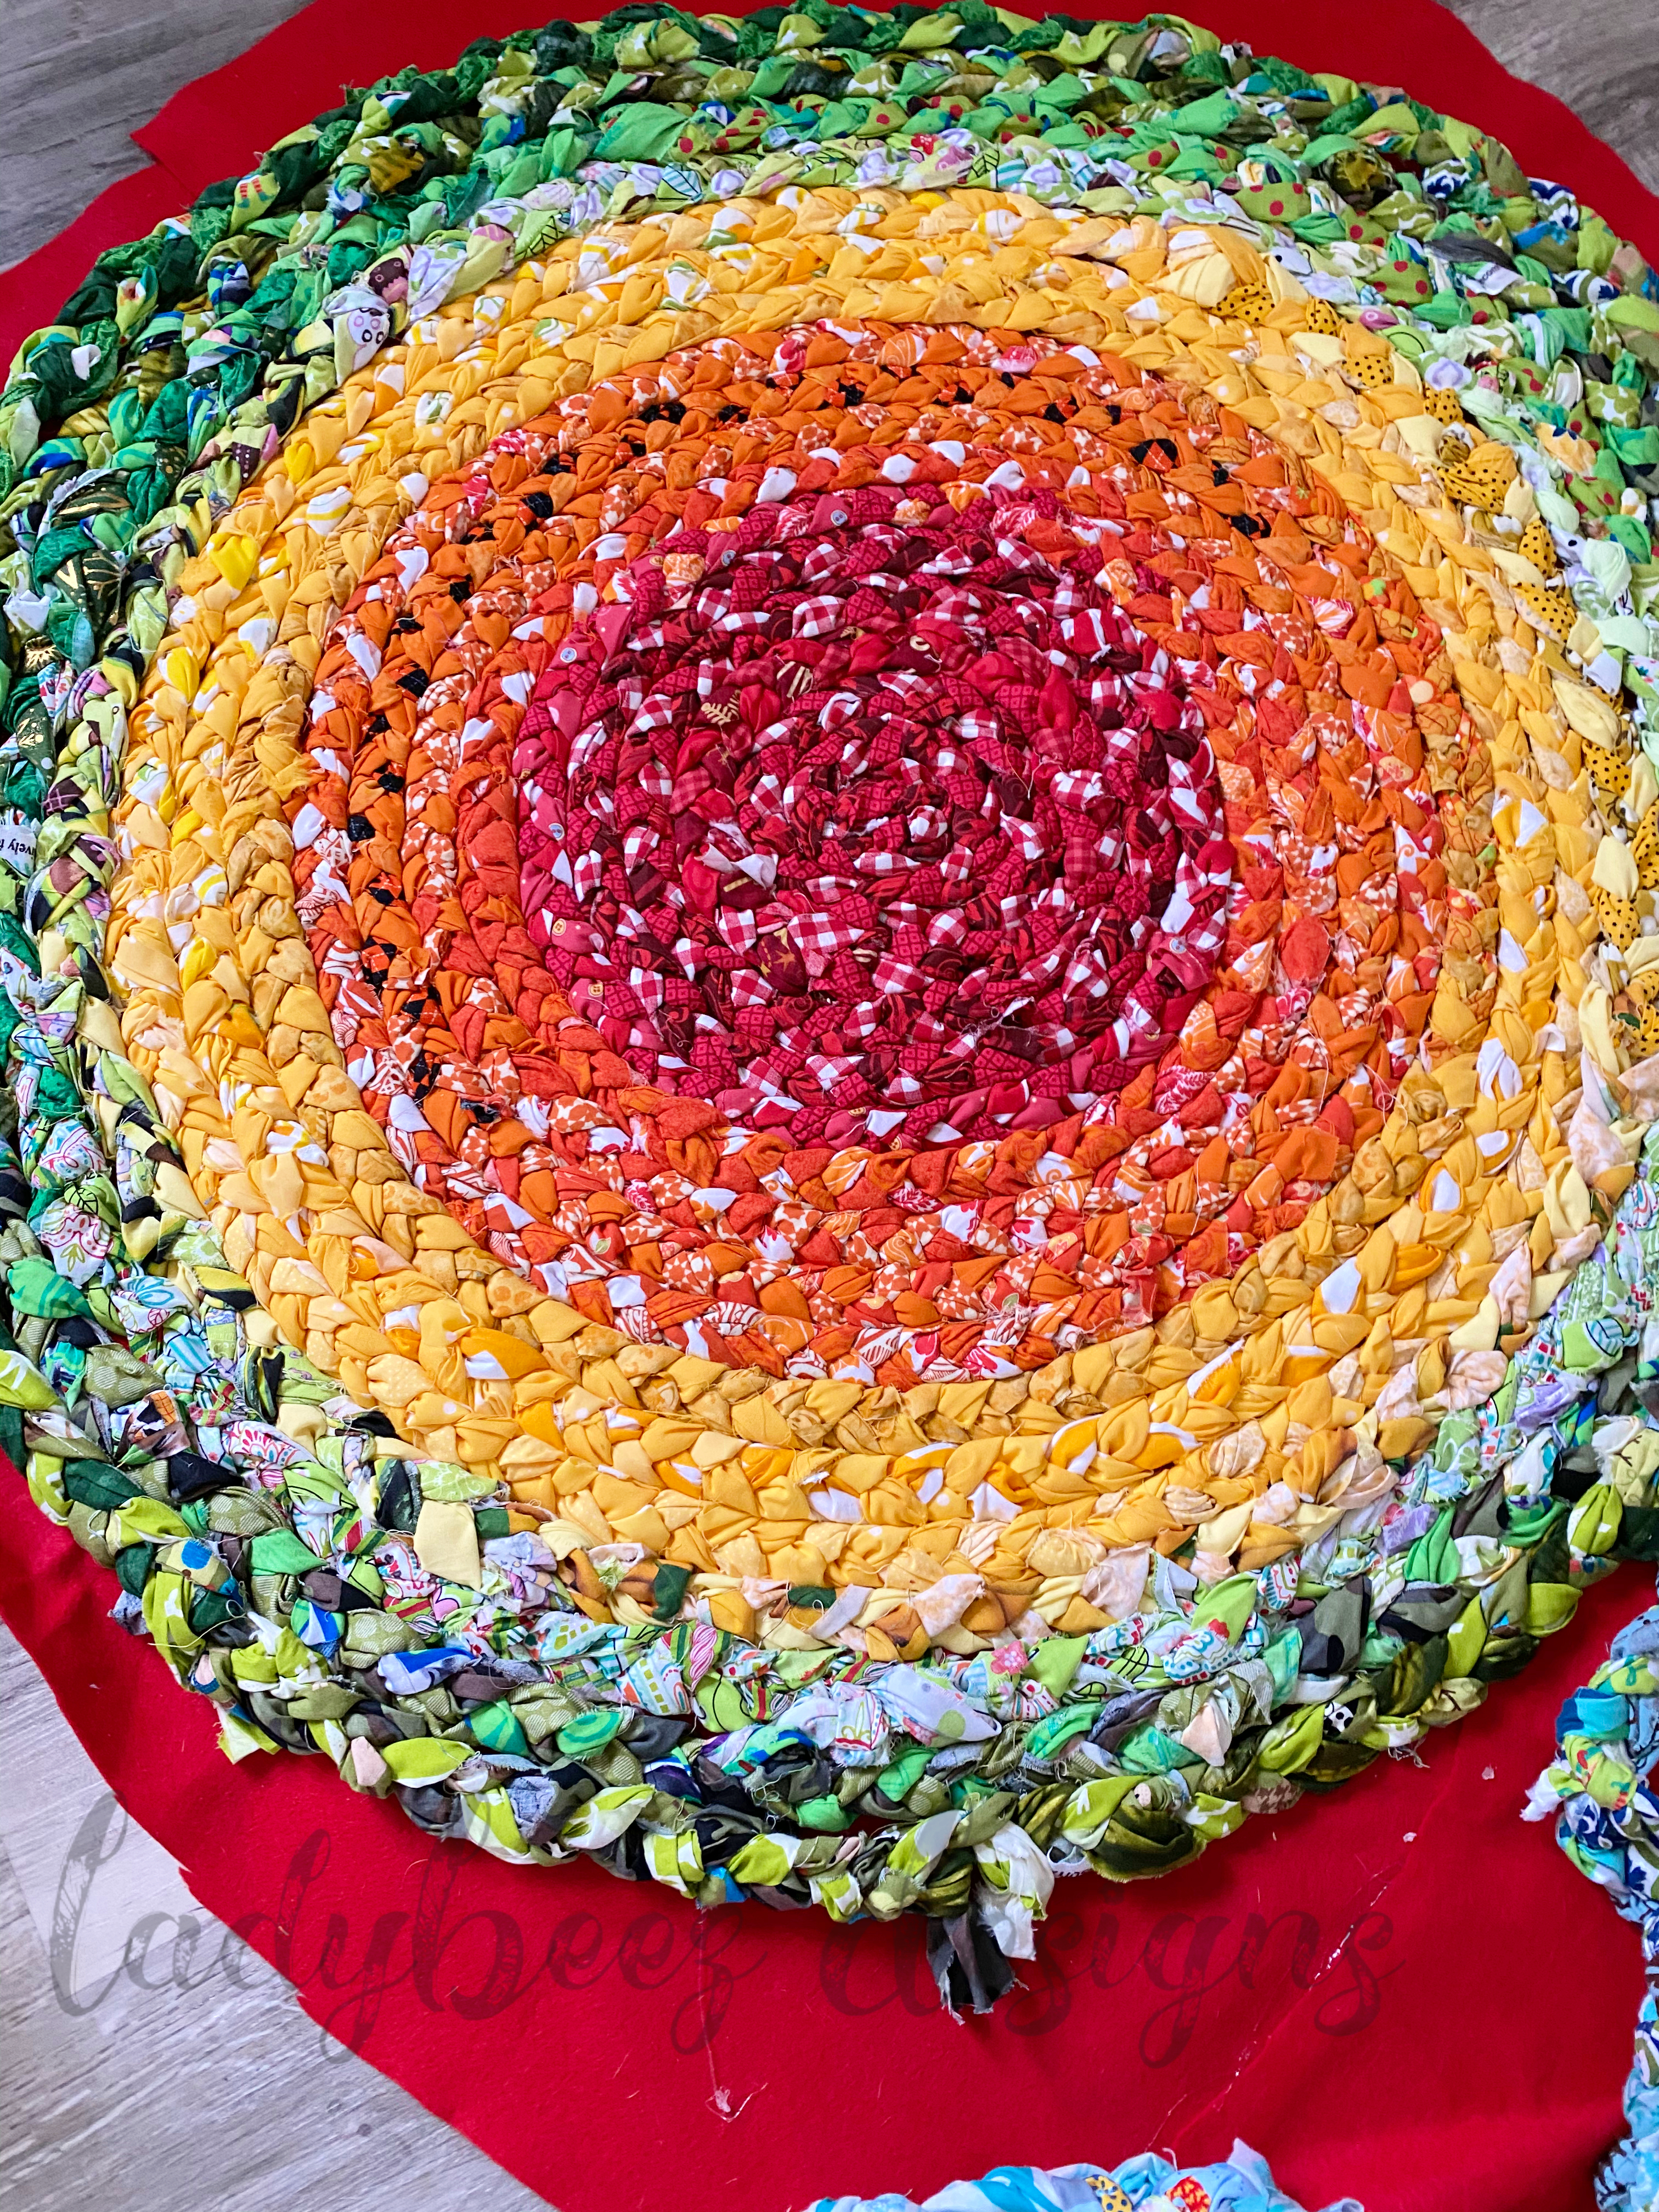
  4. When you’re ready to switch colors, simply start tying the new color in. My Georgia told me she loved how I transitioned each color by gradually adding the next color: I had 3 reds…and then 2 reds and 1 Orange…then 2 Orange and 1 Red….Then 3 Orange….and so on!
  5. My method was to BRAID ALL of the rug before I started gluing. I haven’t decided yet if this was the right move. What happens is: it twists….and there’s a lot of maneuvering to straighten it if you don’t glue it down as you go. But I also loved to look at it all jumbled up!
  6. When you are ready to assemble your rug, you will lay down a piece of felt. (if you’re not familiar, you are able to purchase felt by the yard) I started with a square piece of felt. Glued the start of the braid in the center and began my circle….hot gluing it all down as I went around…and as my rug grew, I simply cut more felt and hot glued it to the first piece.
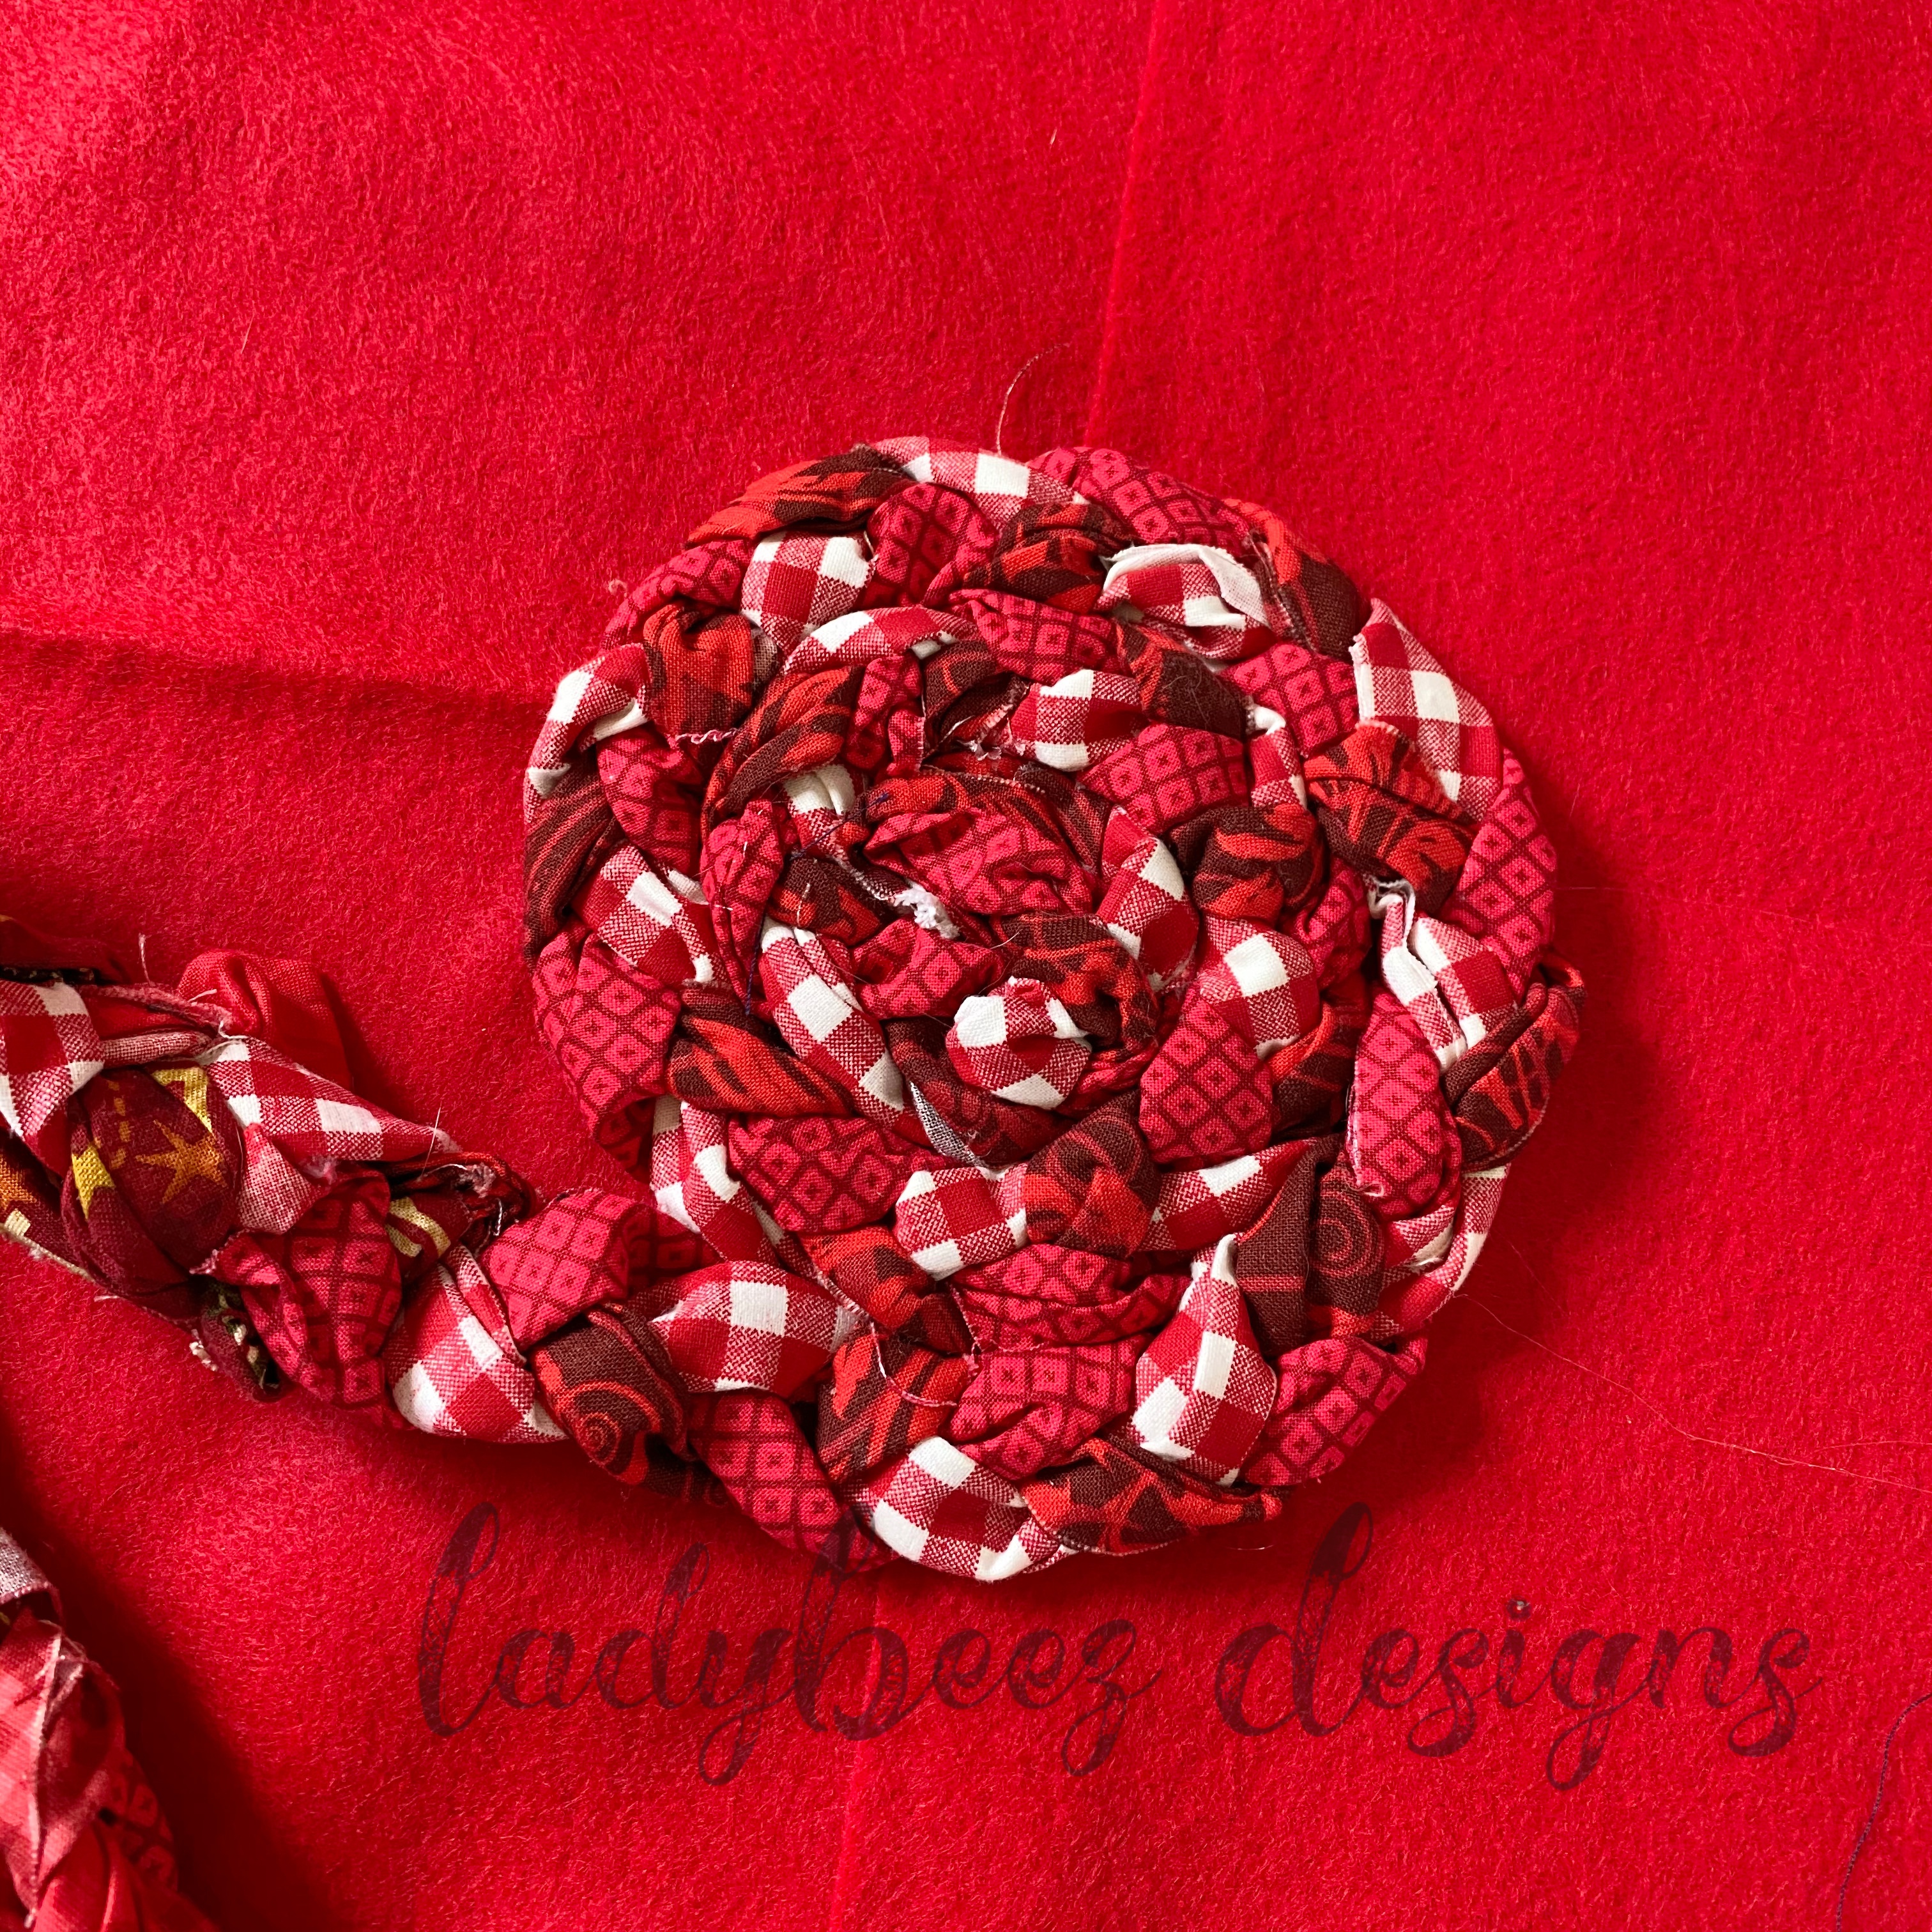
  7. Continue attaching more felt to the base as it gets bigger, this part doesn’t have to be pretty…you won’t see it.
  8. This is strictly assemble and access as you go. When I felt it was ready for the next color I switched! When I started, I was braiding very tightly…so you see the RED-ORANGE-YELLOW looks a bit “cleaner”….turns out though, if I make this again, I prefer the looser braid, as it’s more comfortable and squishy when you walk on it 🙂
  9. Watch it grow!savingpng-7


I’m excited to try different things with my next braided rug! I might try using knit fabric….maybe assemble in a back-n-forth pattern to make a rectangular shape instead of circle….hmmmmm….the possibilities! I’m going to have to figure out something because the boys want one for their room now too! Maybe Denim? I could use all those jeans they rip holes in!

Okay, one more pic before I go….
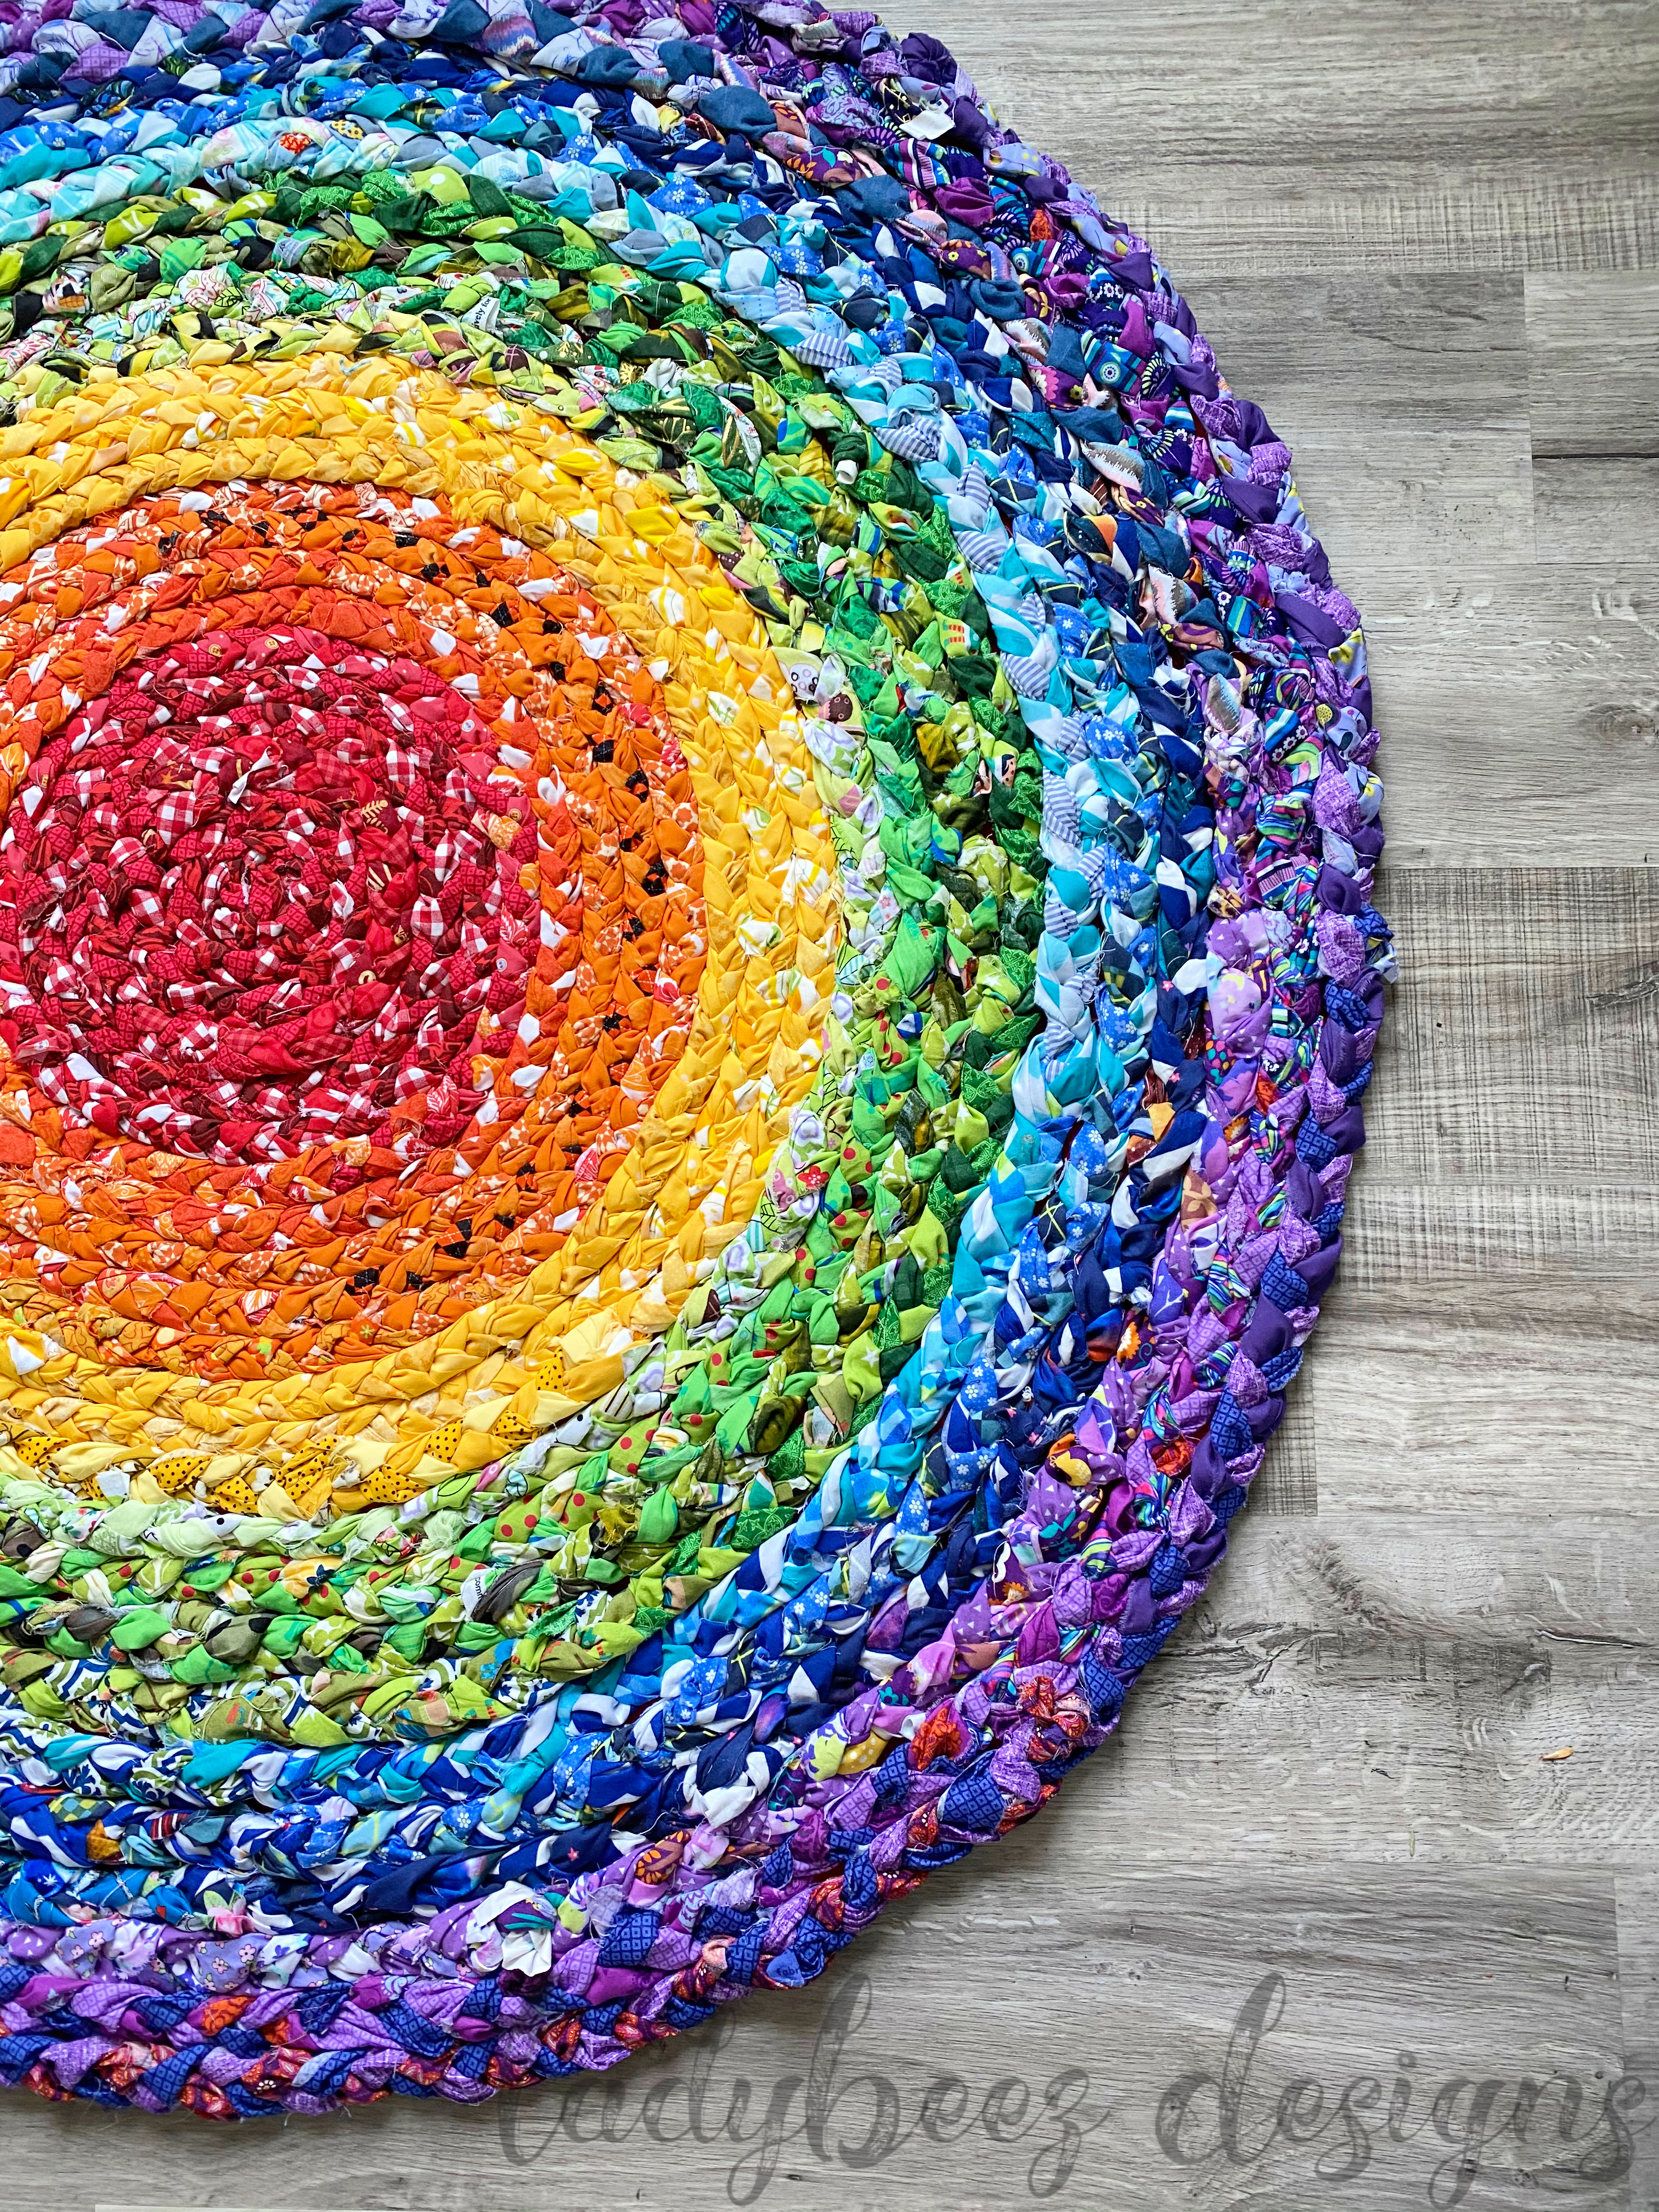
Easy peasy, no?

I’d love to see yours if you make one!


Sewing

Temperature Quilt 2020: February

This is NOT solely a quilting blog. I promise.

It’s just what I happen to be working on right now, so that’s what you’re getting 2 days in row. To keep it real, I have to make sure I hold myself accountable to this project because it could very easily fall to the wayside if I don’t make sure I stay on schedule.

Quick shout out to my girl Becky for inspiring me to take on a Temperature Quilt. She’s an amazing crocheter, and she’s been making Temperature blankets (and other creative projects) for years. Every time I see her beautiful color gradients, I am in awe. Colorful things just make me happy. Not sure what made me think I should start a project of this caliber of my own….but since when did I have a good excuse to start any project? AmIright????

I know you’re all like….”get to the pretties already!” but……

Since I hadn’t blogged about it back in January, I thought I might get a base-post up for ya.

I’m not a crocheter OR knitter….and I’M NOT STARTING, so don’t ask. I’ve tried. I’m sure if I stuck it out, I’d be hooked, but I certainly don’t need another craft in my life. I enjoy giving my business to those folks that are passionate about it, and I’ll stick to sewing. So, I needed to figure out a way to quilt this blanket. After much consideration, I wanted to try something new to me anyway (SEE!!!! I need to be watched carefully, people!….) I wanted it to be portable because if I’m going to add to this daily, I can’t always be at my sewing machine.

Enter: Paper Piecing & the Hexie Quilt

I know, it’s not new. It is, however, NEW to ME! (at least it was on January 1st, 2020 when I started this madness)

Then, I just needed a plan. I came up with this as my Color Palate.

LadyBeez Designs Temperature Quilt Legend

I also decided instead of doing the high temperature for the day…or even the average….I wanted to do 2 a day and record both the HIGH temp and the LOW temp. So everyday is represented by 2 hexies.

I found out that if I ever do this again, I will adjust the color scheme a little bit….but I guess it truly just depends on the weather, right? I thought I’d have more blue in these winter months….but there’s a whole LOT of green.

As a reminder (and for those of you who don’t follow me on Instagram or Facebook…seriously, what’s wrong with you?) Here was the quilt at the end of January 2020. As I said then, notably, we only had 2 days that reached below zero. That was crazy to me! Us Wisconsin folk are a hardy breed and used to some cold winters.

January 2020 Temperature Quilt

So, now let’s see what happened in February, shall we?

February 2020 Temperature Quilt

A little bit BLUER for sure…

We even dipped down to -12 degrees (see the navy hexie) I believe the windchill was -27 that day…Happy Valentine’s Day to Us! Hope you all SNUGGLED UP!

Two months down, 10 to go! I’m counting on you to keep me accountable!

And…not to point out the things that I will not change/fix no matter how much they are driving me nuts…like these two hexies that ended up next to each other. 😡

Sewing

School Pride Serpa Fleece Quilt

This was such a cool project to undertake!

I’ve made a hand-full of quilts before, but this one was special in more ways than one. First of all, this school of ours is such an amazing place…not only do we send 3 of our children here, but MY siblings and I went to school here from Kindergarten to 8th grade. The church, it’s people, are our family. Many members that I see on the regular have watched me grow up…they witnessed all the struggles and triumphs of our family, from my infancy to our marriage and births of our own children. They’ve surrounded us with love and prayers in our darkest hours and our brightest shining moments.

Oh man, see? This place and these people have my whole heart!

So when an announcement was made that we were going to have an event with a silent auction that needed items to be donated, I knew I needed to make something very special. This idea started with our recently new designed logos. I knew I could always upcycle some shirts like I had in the past to make clothing….but you see, I needed something that would appeal to the masses (and clothing sizes and styles can be limiting) Eventually, I landed on a quilt.

But how could I make this one of a kind? I set out to design the fabric! Once I started, it was hard to stop. I had to limit myself to a few designs…or time (and my budget) would get out of control! Here are the 3 I had printed…I made some of my Reusable Snack Bags to go along with the the basket.

As for the quilt itself, I didn’t want to get too intricate and needed to show off these prints….so a simple block quilt it was.

My favorite part though is the trim & back! I could piece together quilt tops all day….but when it comes to quilting and binding…. meh….. not my fave. I found this super quick tutorial from one of my favorite craft bloggers from way back in the day (of course, she never stopped blogging and is now wildly successful) …. ANNNYYYYYWHO, I love the look of quilts, but I am a soft and comfy blanket girl ALL THE WAY. This backing trick gives you the best of both worlds!

So folks, there you have it. My SCHOOL SPIRIT SHERPA FLEECE QUILT!

And for those of you who are attending our school Gala Fundraiser, crack open those piggy banks and get those auction bidding funds ready!

Uncategorized

Taking a LEAP back into Blogging

I gotta say,  I didn’t think I’d be blogging again.

Well, to be fair, I never really stopped DOING all the things I used to blog about, I just stopped typing it up.

Wait, did you even KNOW I had a blog before this one?   If not, I’m telling now.   It was called “For What It’s Worth…or Not”, and I started it back in 2009.

BlogHeader1[1]

Yeesh, I’m old.

I was a fairly new to marriage and a mother of 1 adorable little girl that I wanted to share with the world.  What started as an overly excited mama wanting to share pictures and musings with family and friends, lead me into the deep, dark rabbit hole of craft bloggers.

Honestly, it was the best thing that ever happened to the creative side of my brain. (that was in desperate need of an outlet).  I was able to connect with other moms that shared the same interests, joys, and struggles all while giving me a sense of accomplishment.  It was a WIN WIN WIN WIN WIN all around.  And if I’m being truly honest…this blogging community was 100% responsible for me learning to sew.

I know you probably think I learned from my mother, and don’t get me wrong….I asked her a million questions (and argued with her about her answers 999,993 times), but we just didn’t learn the same way.  I picked up sewing from online blog tutorials and PDF patterns….she used those flimsy tissue paper patterns that I WILL NEVER UNDERSTAND HOW THEY ARE STILL AROUND….Burn them all.   We even constructed garments differently…she liked to wing it, I am by. the. book.  At any rate, we complimented each other well, and soon we were selling our creations as LadyBeez Designs.

I spent a long time (YEARS) keeping my blog going, sharing my growing family, and trying to make LadyBeez Designs a profitable business.  All of it was important to me.  All of it was fun….until one day, I found out someone had stolen a picture of our son and was using it in a way that scared the BLOGGER right out of me.  I immediately unpublished my personal life/craft blog and haven’t posted on it since.

So what’s changed now?   If you know me personally or even been a customer/visitor of LadyBeez: I’ve experienced the highest of highs and the lowest of lows.  We’ve since completed our family with 4 children, and most notably to me personally and to the business, my oldest brother passed away unexpectedly followed by my mother being diagnosis with cancer and passing away within the same year.   Heavy stuff, my friends.

This life here on earth, I tell ya….it’s unpredictable.  It does, however, keep on going for the rest of us that are blessed to still live it.

I’ve enjoyed learning more about sewing and challenging myself to try new things.  Some of it has worked out great…others, not so much.  Which brings us to the now.

It’s time to gather up all the things I love and share them again!

You can expect some Sewing…both for sale and for fun!

Crafts & DIY….I love me a hot glue gun!

Home Decor & Holidays…..I love to celebrate seasons and special days!

And

Unashamed Hallmark Movie Reviews…..(if you stick around you might find yourself loving them too)


So Welcome to the new friends….and Welcome back to my old ones!

This is going to be fun!

DSC_9422

Photo Credit: Ashley Werner Photography
Shop Talk

Don’t Mind Me…Just Sprucing Up the Place

If you’ve click on this site….you’re one of the few!

Come back soon for NEW CONTENT and a FRESH NEW LOOK!

coming-soon[1]